
This is an old revision of the document!
Question: My USB Channel or other USB hardware isn't recognized, what should I do?
Question: When connecting the USB, I receive a message that the maxmimum services or end points are reached. How can I fix this?
Answer: Link: please follow the steps at this link
In case one or more USB channels or other hardware isn't recognized by the compputer and on the mixing consoles the USB input leds are not lighting.
First take a look at these steps.
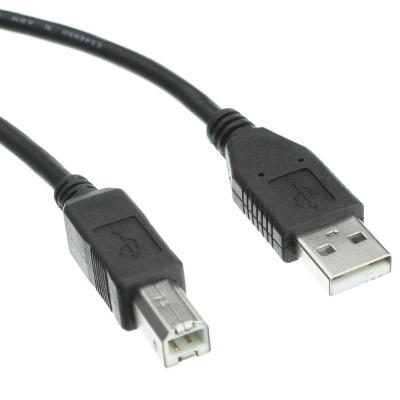 * Be sure that your USB cable has a maximum length of 1,8 meters (5,9 ft).
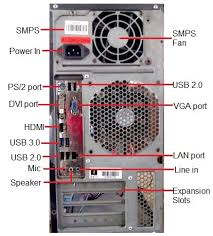 * Connect your mixing console to a USB port directly at the mainboard of your computer. So no internal cables are used.
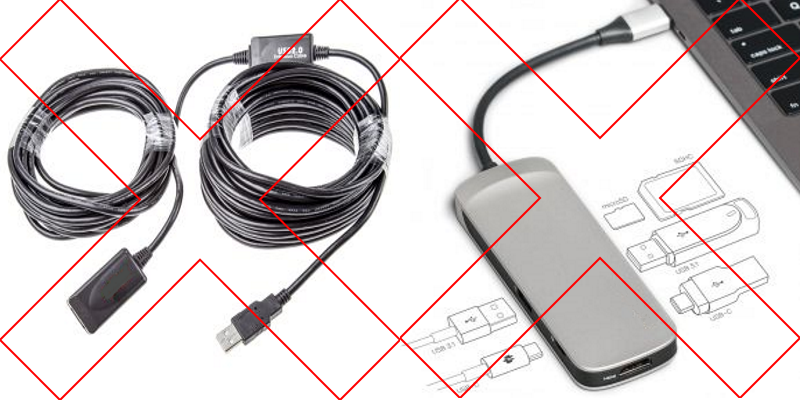 * Do not connect the mixing console trough a USB Hub or a USB Extender.
This way the USB connection has enough bandwidth to use the USB Audio codecs and USB hardware for Meter software and controls.
Inside the mixing console is a USB Hub that can handle the bandwidth this hardware needs.
For customers that receive a operating system message that the maximum end points or services are reached.
In some computers the manufacturers have chosen to use xHCI USB 3.0 ports.
This actually means that they combined the hardware of 2 USB 2.0 ports to reach higher speeds like the USB 3.0.
Combining these ports means that they need to share the amount of end ports that all USB equipment has.
When detecting the connected equipment the Operating System fills it's list of end points for that port until the maximum is reached.
With each Audio Codec needing multiple end points as well as the used hardware for controls and meter software, one mixing console can take all the end ports of a port.
This can be fixed by setting the USB ports to work as non xHCI ports (USB 2.0) in the BIOS configuration of your computer.
Be carefull to only change USB settings! Changing other settings can harm your computer!
D&R is not responsible for changing the wrong settings!
Another option is to use a USB2.0 card that is added to the computers ports.

Then you can try the following procedure.
* Disconnect your mixer from the PC. (USB Cable)
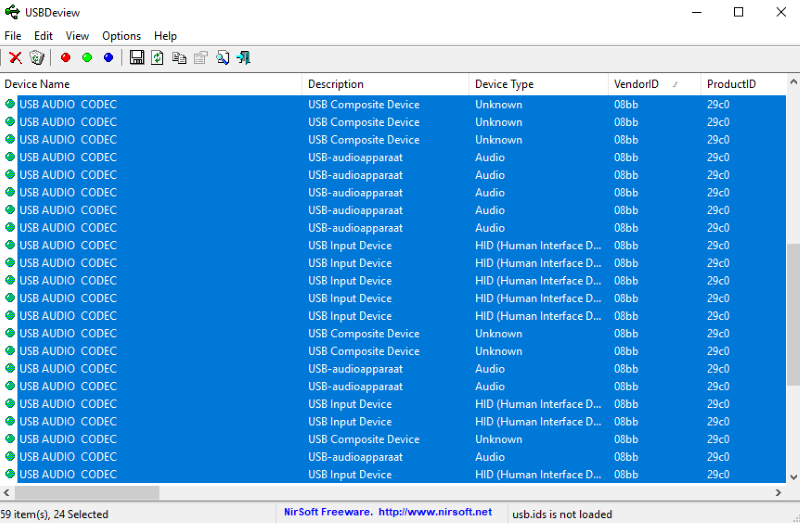
* Download USB Deview and run it. http://www.nirsoft.net/utils/usb_devices_view.html
* Remove all devices with the name “USB AUDIO CODEC” in it with the trashcan.
* Connect your Airence with the standard USB cable.
* Now, wait patiently till Windows will recognize all the USB codes again.
* You should see all the usb audio codecs come up in usb deview again.
* If everything went fine all the four LEDs should be turned on. If not, something went wrong.
* Close USB Deview
We also have some other usefull tricks to get your USB device to work.
* Method 1: Unplug the computer and mixer from the power supply and re plug.
The most recent computers aren't really going off when you shut down, the mainboard of the computer still have some power lines connected for the stand-by situation.
To reset the hardware completely it can help to disconnect the computer and mixer from the power outlet.
* Method 2: Update the Device driver.
Go to your control panel and then to device manager.
Find the Unknown Device and click on Properties, go to the driver tab and click Update Driver..
* Method 3: Disconnect all USB devices and restart your computer.
Disconnecting all USB devices and restarting and reconnecting will force the computer to re-detect USB devices.
Connecting on different ports can also force the computer to detect in a different sequence.
* Method 4: USB Root Hub power management.
In the Device Manager expand Universal Serial Bus Controllers, right click on USB Root Hub and Properties.
Go to the Power Management tab and uncheck Allow the computer to turn of this device to save power checkbox.
This setting has to be done for each root hub, on the computers mainboard are the USB connectors also connected to high speed USB hubs.
These USB hubs each have enough bandwidth to connect a D&R mixer.
Connecting a external Hub will devide the bandwidth over more ports and causing the bandwidth being to low.
Now restart your computer and reconnect the usb device, when the computer recognizes the USB device you can leave this settings as made.
When it still doesn't recognize the USB device reverse this setting for every hub and reboot.
* Method 5: Update Generic USB hub drivers.
In the Device Manager expand Universal Serial Bus Controllers, right click on USB Root Hub, choose Update Driver Software for each USB hub.
When you downloaded the drivers from the manufacturers website select Browse my computer for driver software.
Now browse to the folder where you downloaded the driver and install.
* Method 8: Uninstall USB Devices.
Be carefull with this option, when your Keyboard and Mouse are also connected by USB you can end up with an computer that can't be controlled.
In the Device Manager right click on each USB device and select Uninstall.
This can also be done with USB deview that is mentioned before.
USB deview will also show the USB devices that are not connected (hidden devices), you can also uninstall these.
Rebooting your computer will force to re-detect all the devices.
* Method 9: An other way to uninstall hidden devices.
To view hidden devices in the Device Manager you'll first have to enter the next commands in the Command Prompt.
set DEVMGR_SHOW_DETAILS=1
set DEVMGR_SHOW_NONPRESENT_DEVICES=1
start devmgmt.msc
When the Device Manager is started click View and Show hidden devices.
Expand Imaging Devices, Universal Serial Bus Controlles and Unknown Devices.
You can now Uninstall the greyed out devices.
* Method 10: Disable and Enable USB ports in the bios.
Restart your computer and enter it's BIOS, how to do this can be find in the manual of your computer.
Be carefull to only change USB settings! Changing other settings can harm your computer!
D&R is not responsible for changing the wrong settings!
Be sure that you have a Keyboard and or Mouse that is connected to a different port then the USB.
Now Disable the USB functionality and reboot your computer to let your Operating System detect the new setting.
When the system is booted restart your computer again and enter it's BIOS.
Now Enable the USB functionality and reboot your computer to let your Operating System detect the new setting.
* Method 11: Updating the BIOS.
KEEP IN MIND TO ONLY DO A BIOS UPDATE WHEN YOU KNOW THE RISK!
A FAILED BIOS UPDATE BY FOR EXAMPLE A POWER FAILURE CAN CAUSE THE COMPUTER TO NOT OPERATE!
In some situations a BIOS update can solve USB issues, these issues will be known by the manufacturers of your computer or mainboard.
Before doing an BIOS update get informed about if there are issues with your system and the possible fixes.
If this does not work, please consult the factory by filling in our Support Request form.
Support Request