
This is an old revision of the document!
Question: How do I setup Aircast to work with my Airlite
Answer: please follow the steps at this link
Easy setup manual Aircast with an Airlite
In this Easy setup manual you’ll learn how to set up Aircast with you’re mixer by following the configuration pictures.
First you'll have to make it easier to identify your USB Audio Codecs.
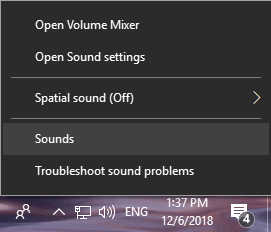
Go to the sound settings of your Windows.
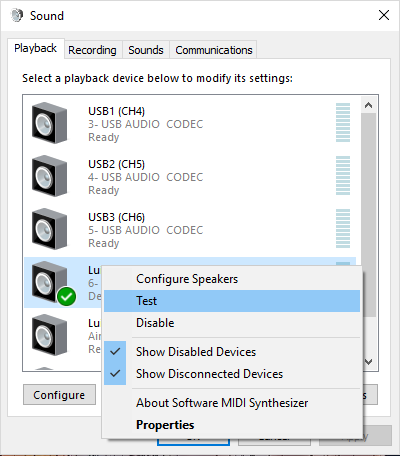
So for all the USB audio codecs you'll need to play the Test sounds to determine to which channel the USB Audio Codec is connected in your mixer.
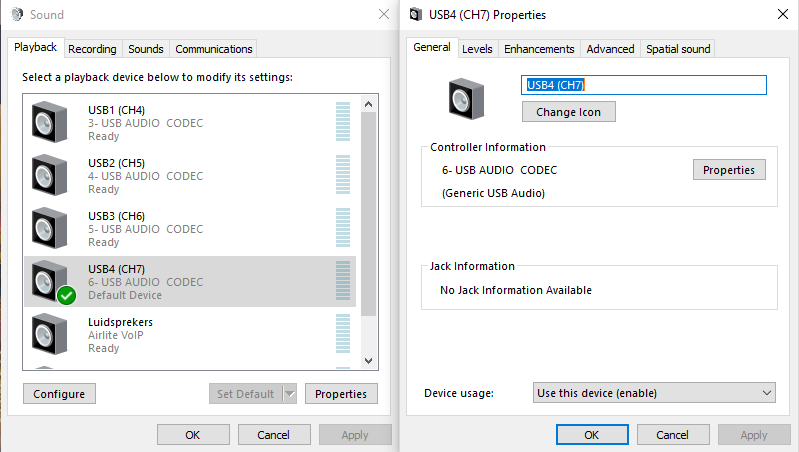
You can rename them after double clicking on the USB Audio Codec.
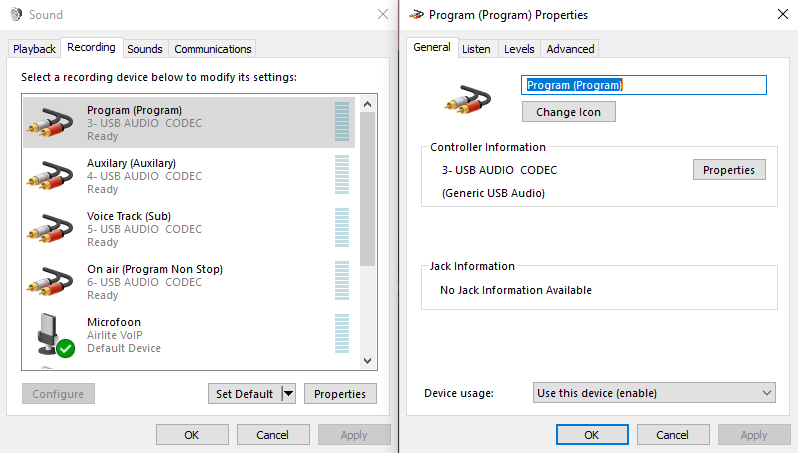
The same has to be done for all the outputs to the computer.
This can be done with a Microphone connected to a Mic channel.
- First test with only the ON activated and look at the small VU meter in the window, this one will be Program.
- Then hold down the ON button till it starts blinking to activate the Voice Track bus.
- Press the on button twice to return to the normal ON state.
- Turn the Aux potentiometer (Full open) of the channel and the Aux Send (2 O'Clock) (Under the VU meter) to see where the Aux signal comes in.
- The last one is the On Air
We also have an instruction video that shows how this has to be done

All visual settings have to be done in the configuration tool and the rest can be done at the Control panel in Aircast.
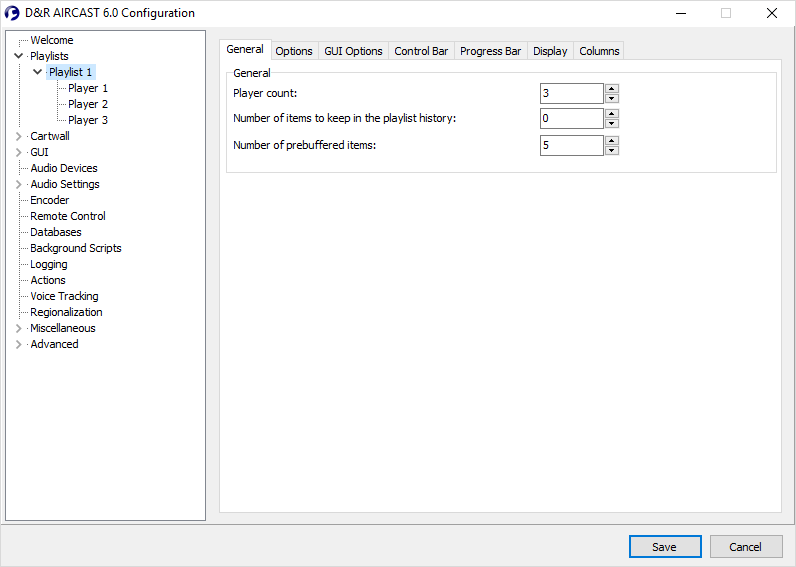
To use Aircast with 3 players you’ll have to go to the Aircast configuration tool and change Player count to the right amount of players.
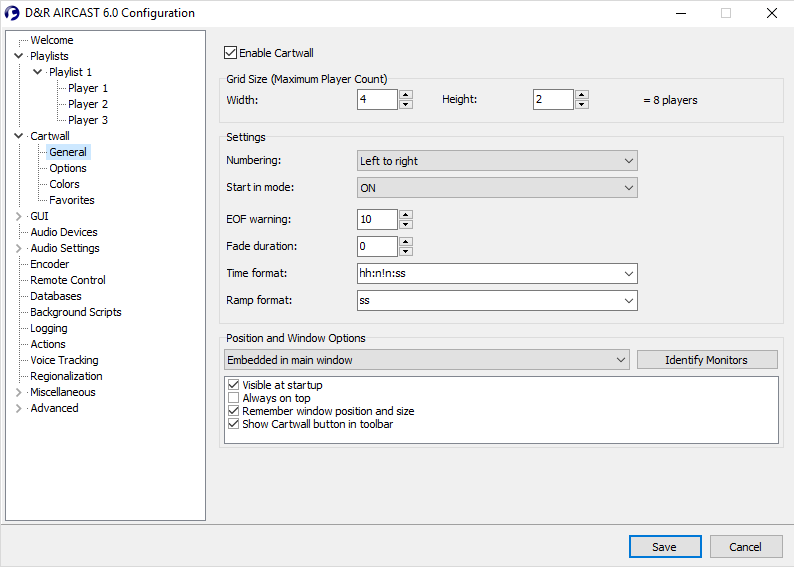
The same can be done with the amount of Cartwall players, you’ll have to change the Width and Height.
A Width of 4 and a Height of 2 creates 8 players.
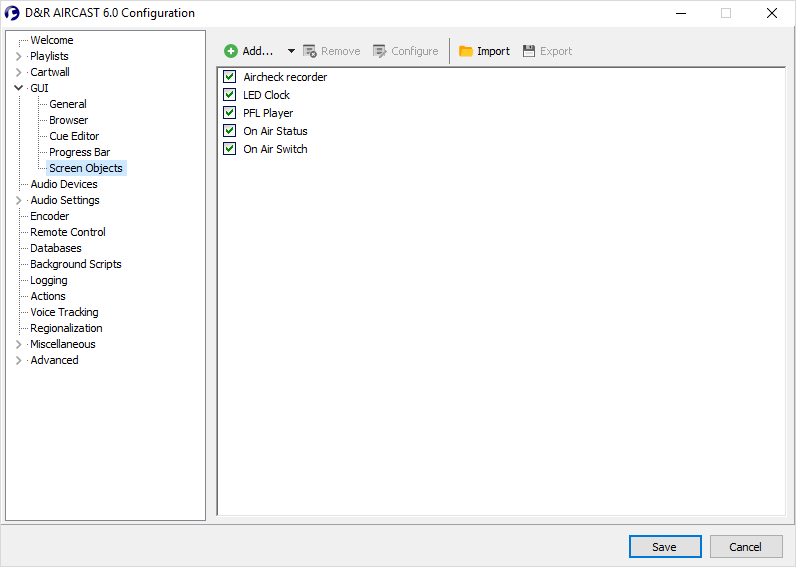
It is also possible to add Screen objects like the Aircheck recorder, LED clock, PFL player etc.
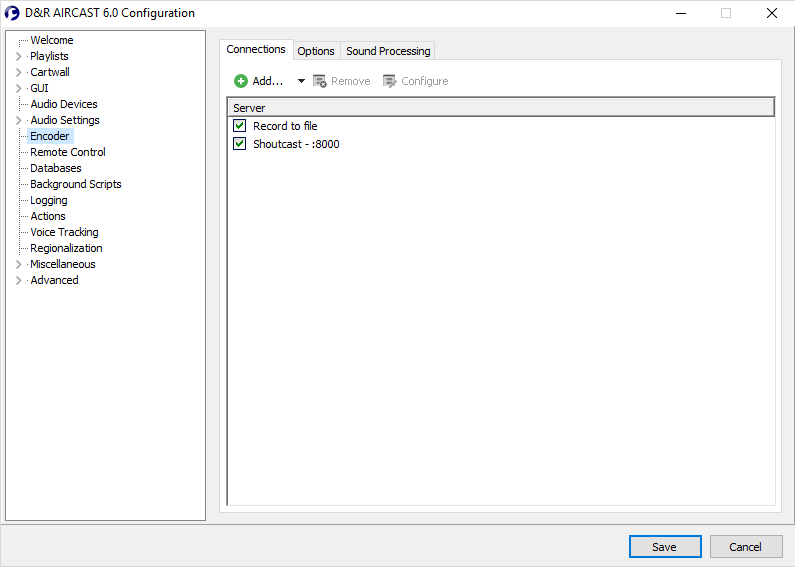
Also the Program recorder, shoutcast stream server are visible options so they'll have to be added in the Configuration tool.

To use the Fader starts of an Airlab you'll also need to set the Serial port settings to the right Baud rate.
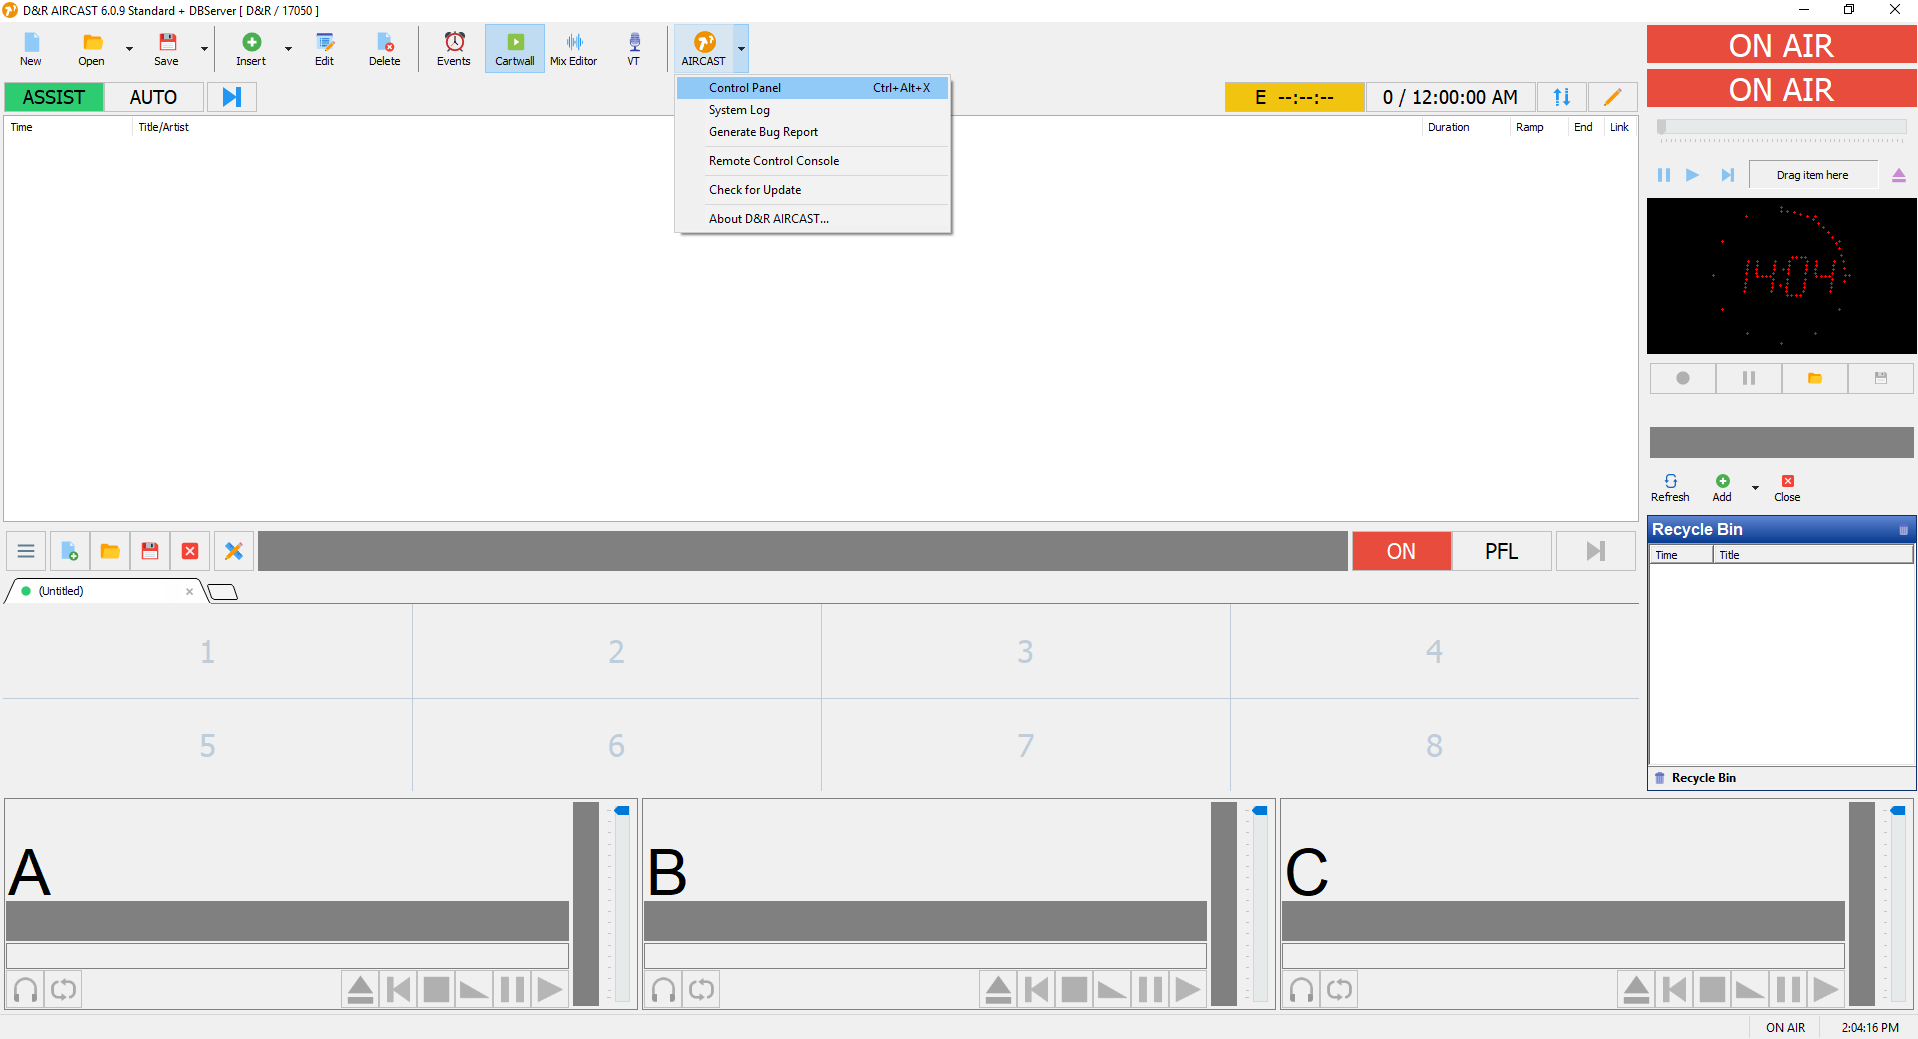
For the non visual configuration you can go to the Aircast Control panel.
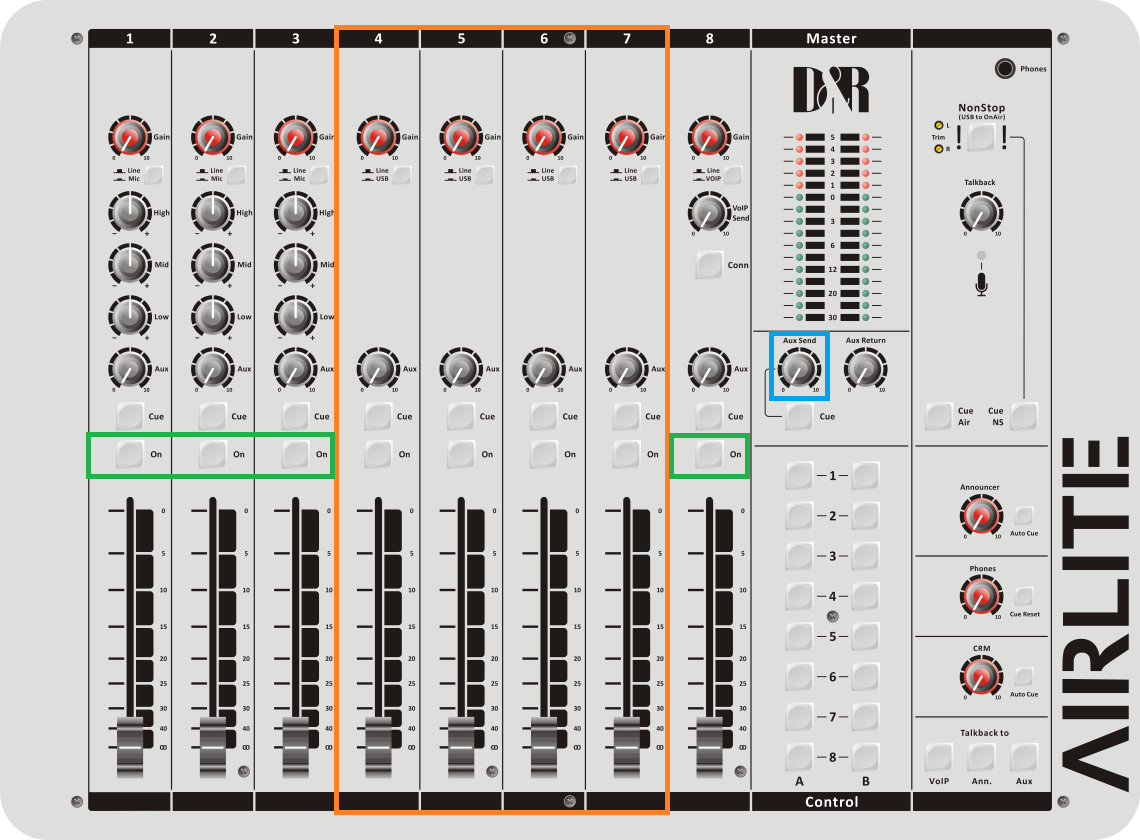
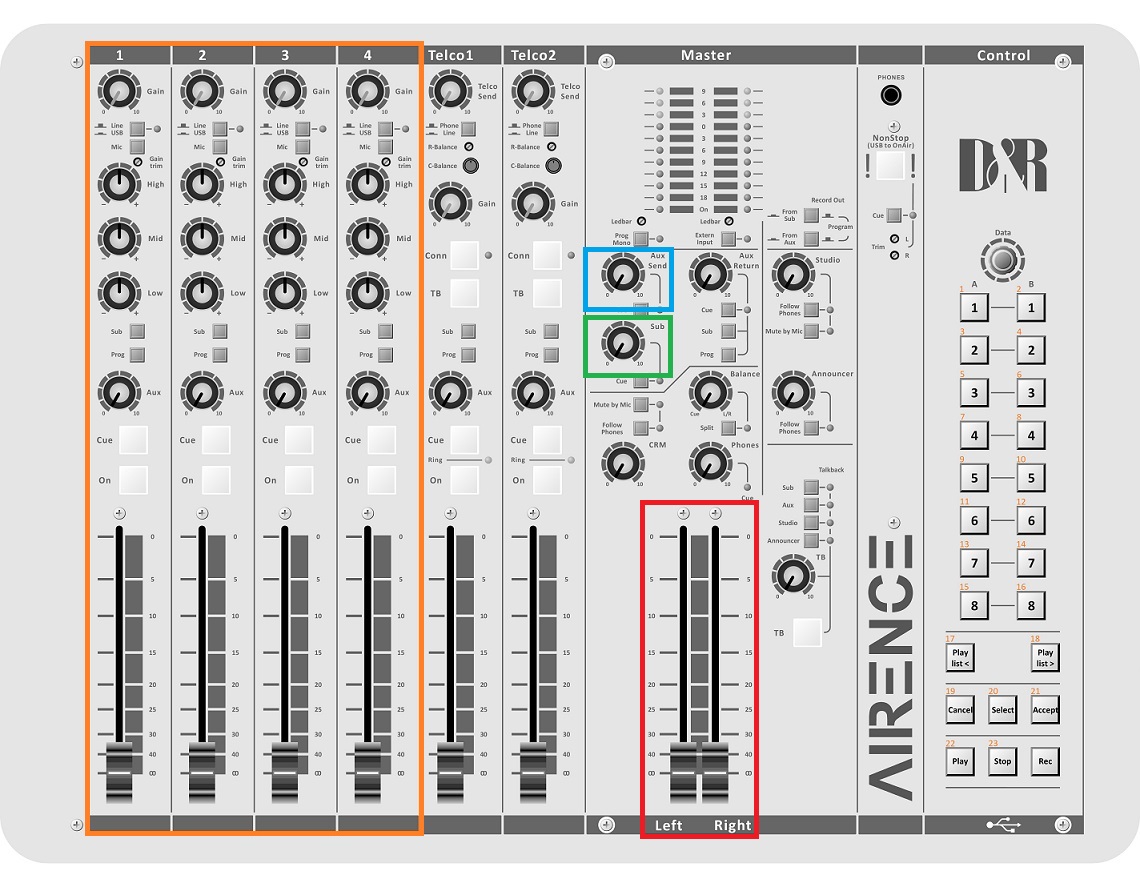
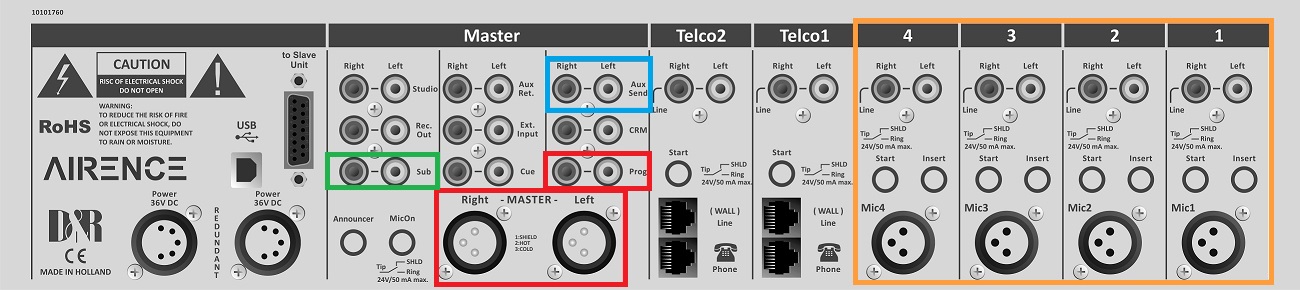
On this front you see the inputs and outputs highlighted with colors to easily recognize them.
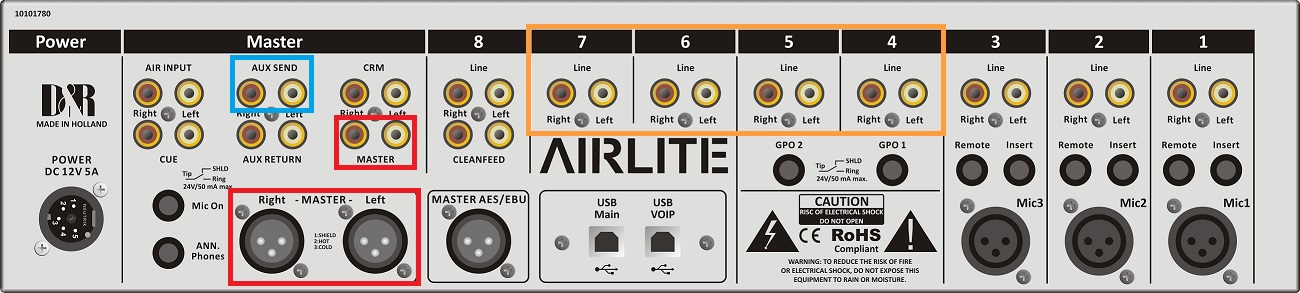
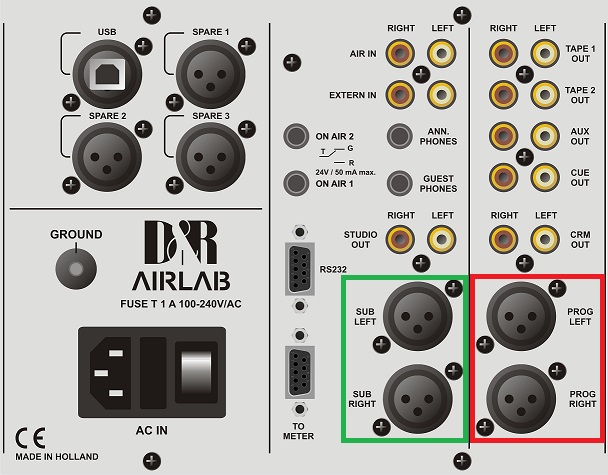
On this backplane you see the inputs and outputs highlighted with colors to easily recognize them.
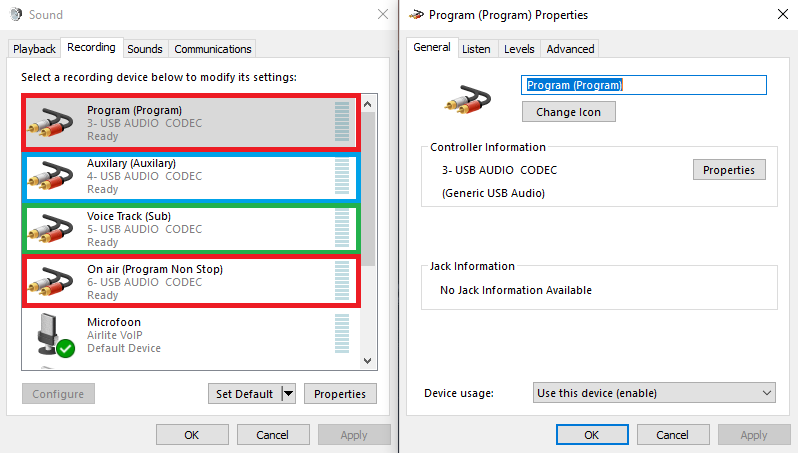
Here you see the Windows Sound settings with the corresponding inputs highlighted with colors to easily recognize them.
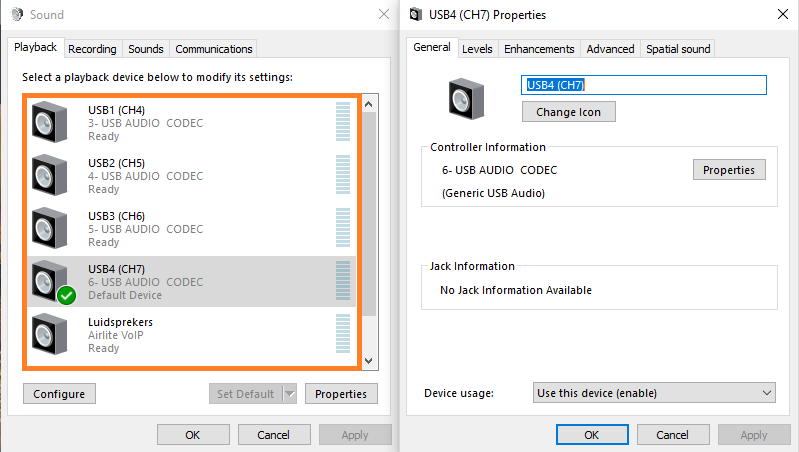
Here you see the Windows Sound settings with the corresponding outnputs highlighted with colors to easily recognize them.
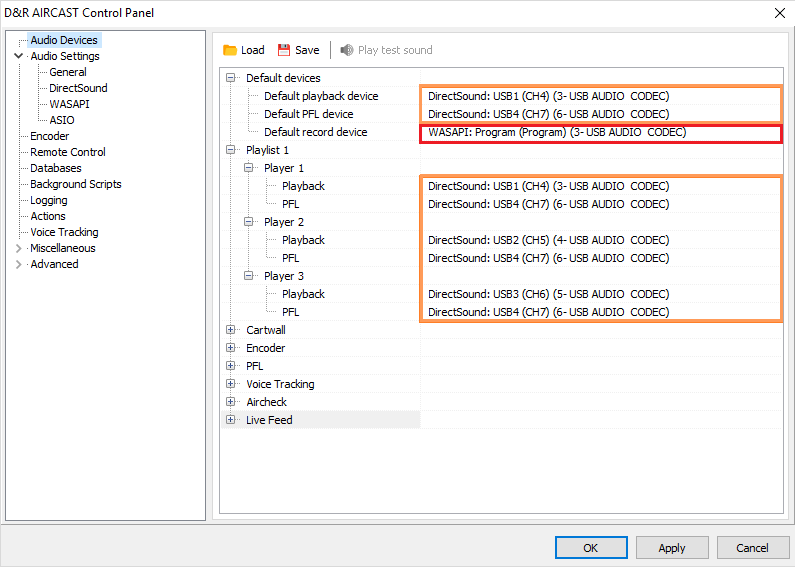
- Player 1 plays to Channel 1 and it’s PFL goes to Channel 4
- Player 2 plays to Channel 2 and it’s PFL goes to Channel 4
- Player 3 plays to Channel 3 and it’s PFL goes to Channel 4
- The standard playout goes to Channel 1, the standard PFL goes to Channel 4, the standard recording device is Program (Non Stop)
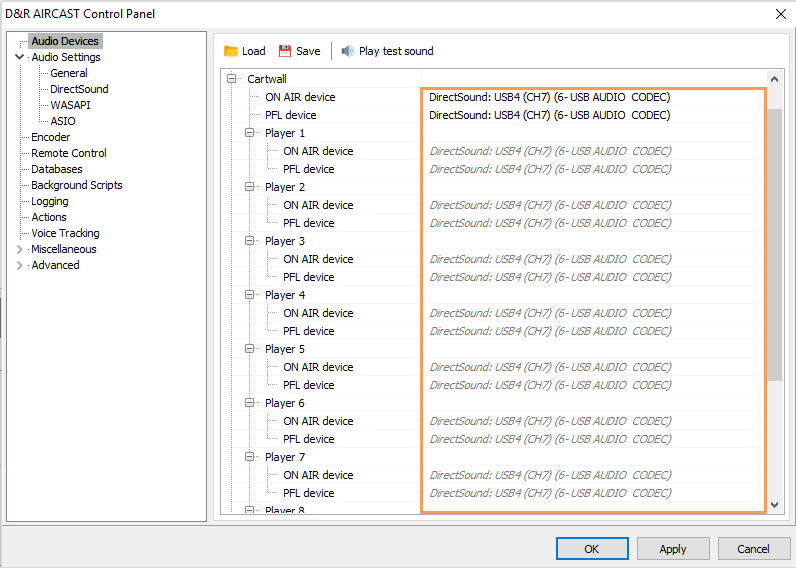
- All the Cartwall players playout to channel 4
- To listen to the encoder you can select Channel 4
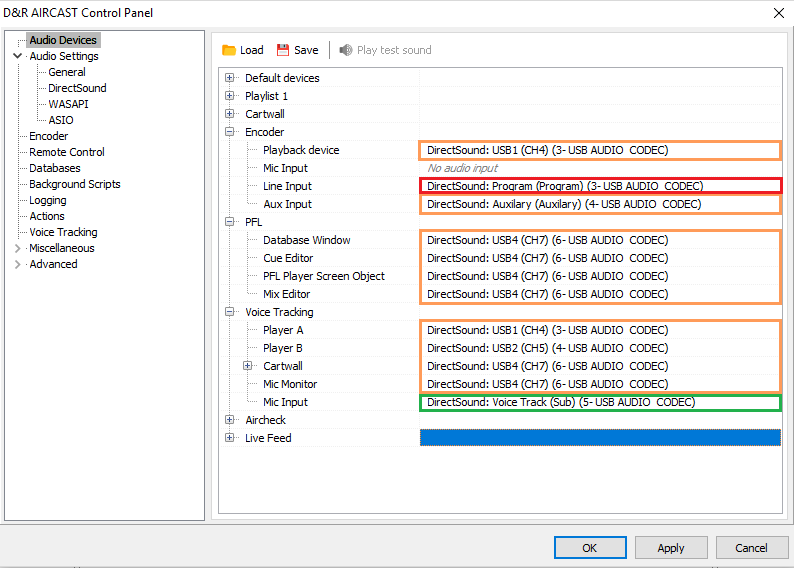
- it’s line in signal comes from the Prog (Non Stop).
- as an Aux signal it receives the Aux.
- The PFL player comes out of Channel 4.
- For the Voicetrack recorder we tell Aircast that Player A is Channel 1.
- Player B is Channel 2.
- Cartwall is Channel 4 as well as the Mic Monitor.
- The Microphone input is the Sub / Voice track bus.
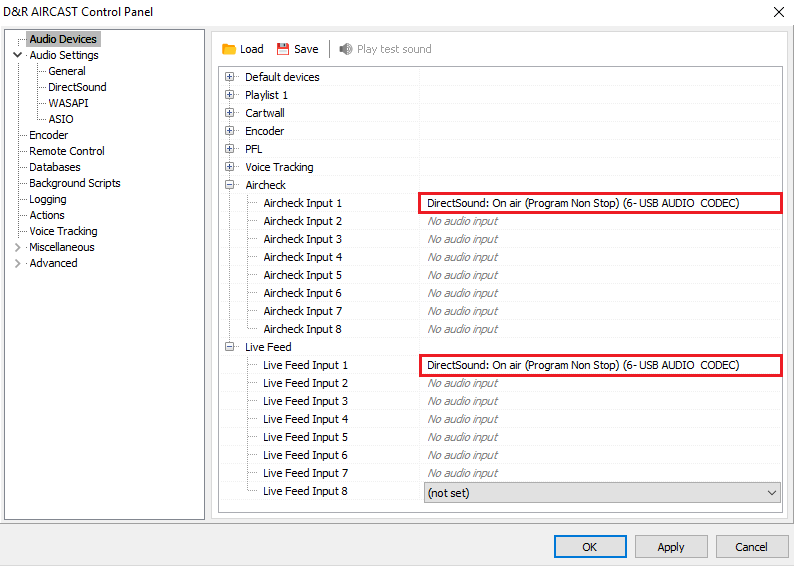
- To record the Aircheck you can use different inputs.
- in this case we selected Prog (Non Stop) but this can also be the on air input at an Airlite.
- The Live Feed uses the Prog (Non stop) input.
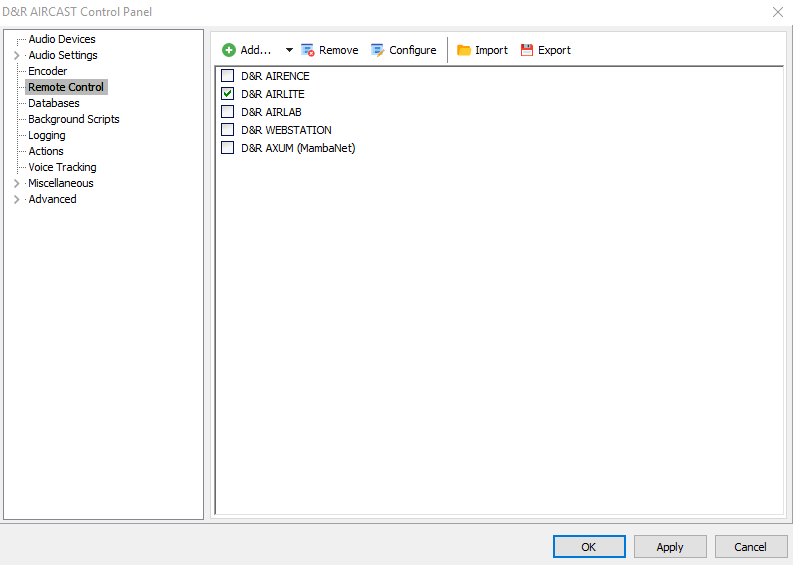
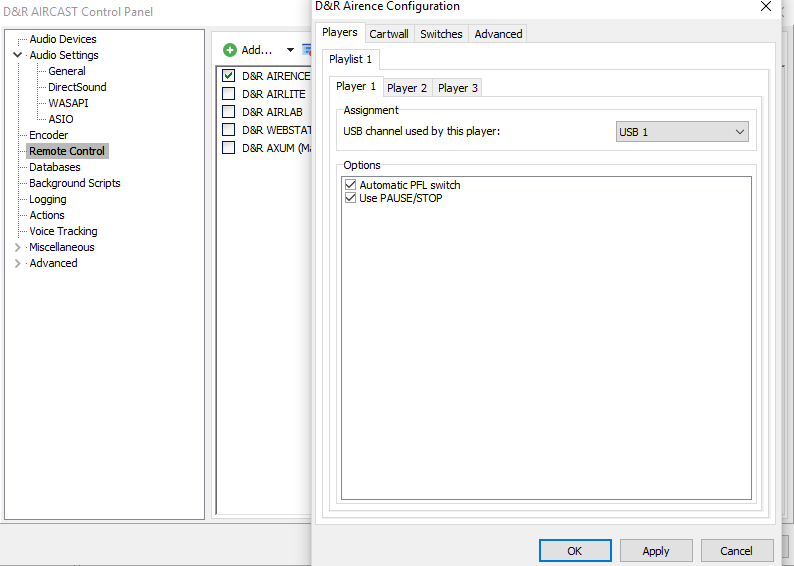
To control Aircast with you’re D&R mixer you’ll have to add the Remote Control function of the specific mixer.
 \\
\\
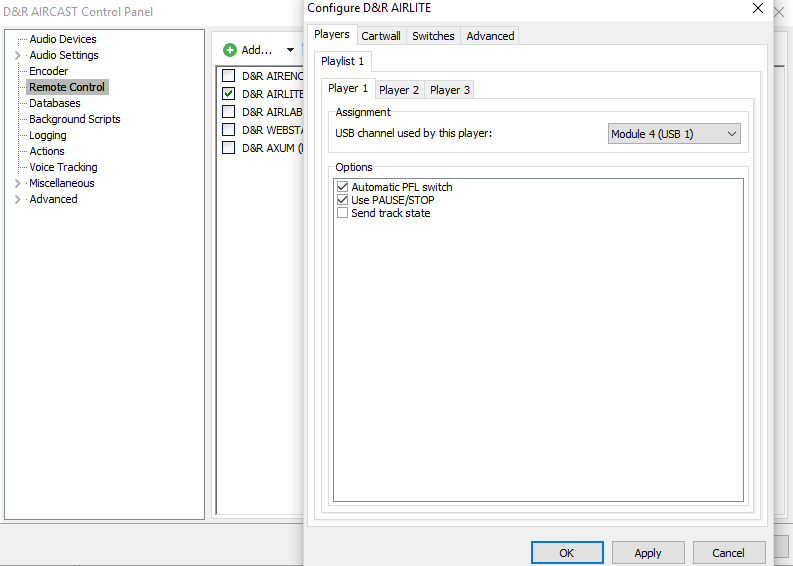
You’ll have to tell Aircast that Player 1 uses the channel USB 1.
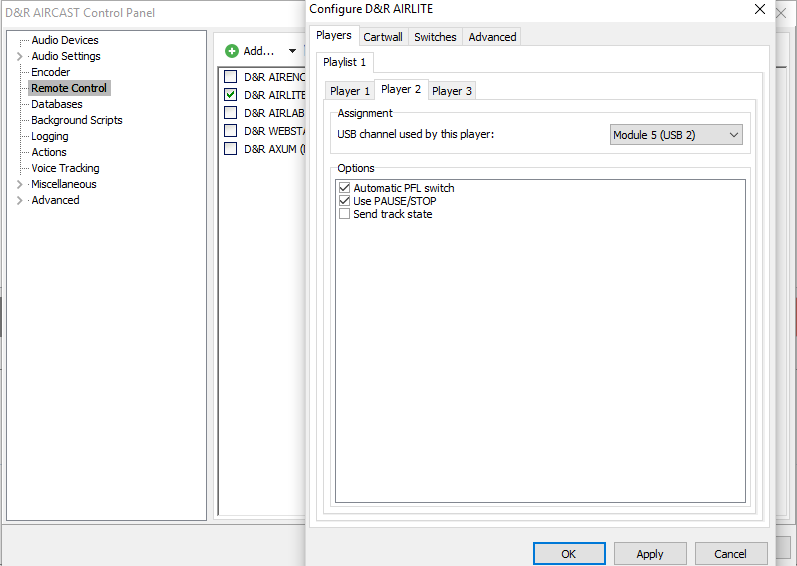

Player 2 uses the channel USB 2

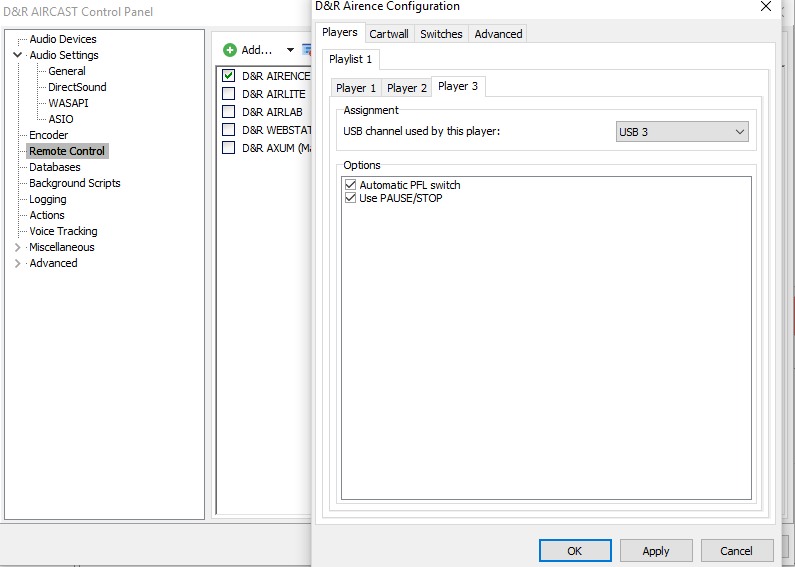
and Player 3 uses the channel USB 3 this way the Fader starts will work fort his channel.
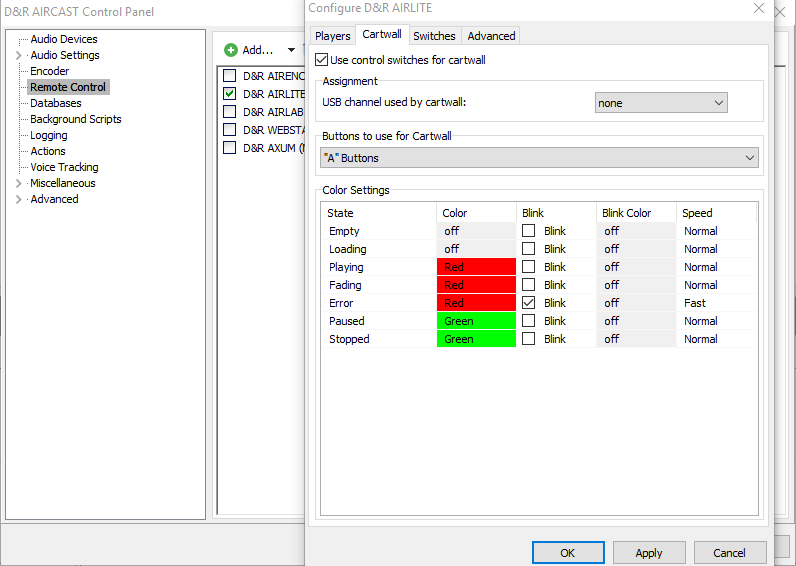
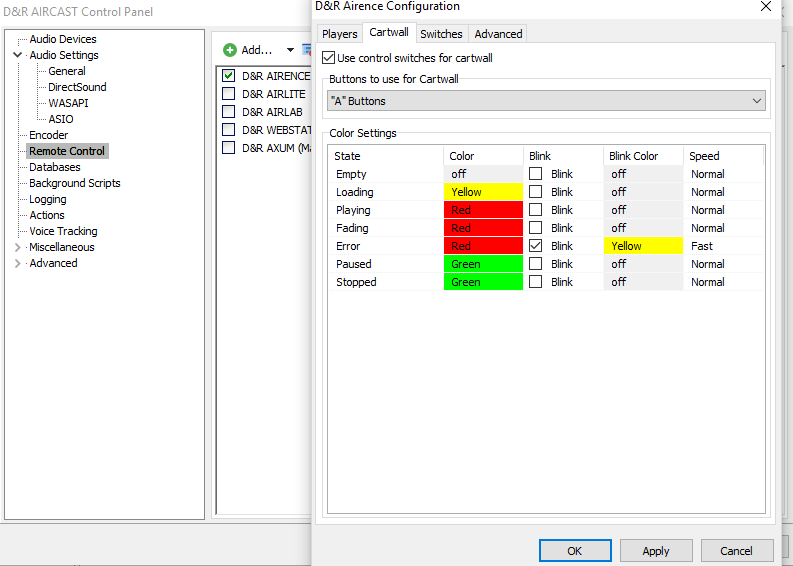
For the Cartwall we use the 8 buttons in Row A, it is also possible to change the colors of the Led’s.
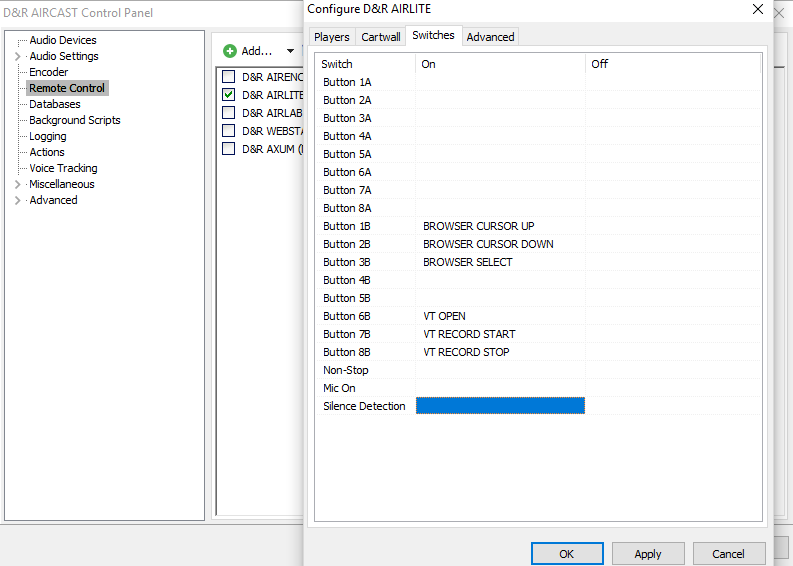
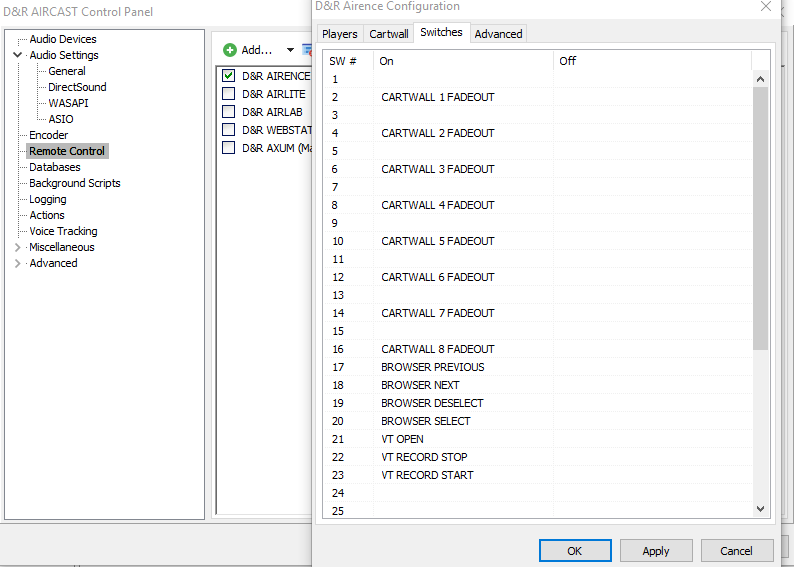
For the other switches that arent used for the Cartwall players we can configure different fucntions.
Keep in mind that the switches in Row A (1, 3, 5, 7, 9, 11, 13, 15) are already in use and have to be empty.
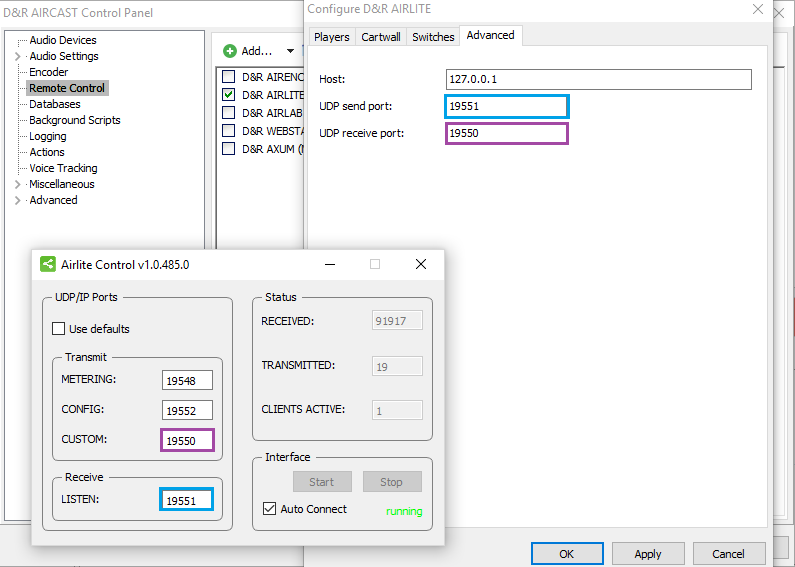
Be sure that the Port numbers correspond with the Port numbers in Airlite Control
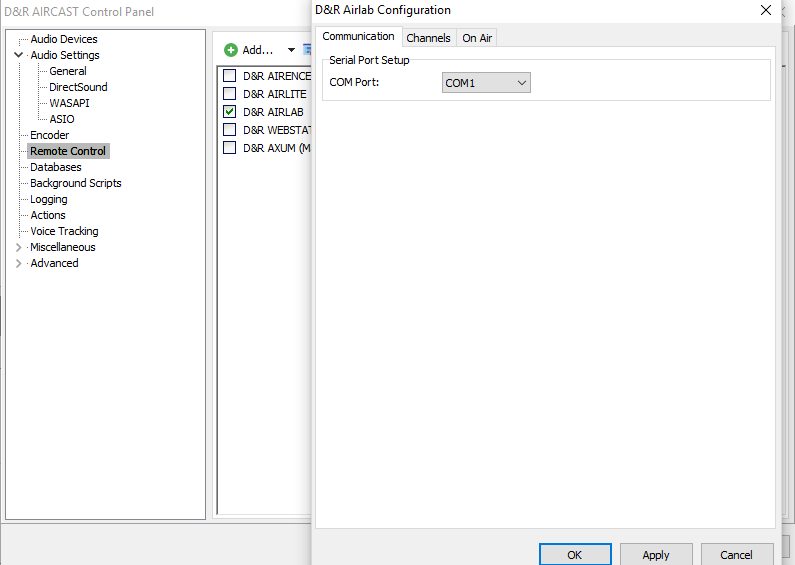
An Airlab sends it's Fader starts trough Serial port.
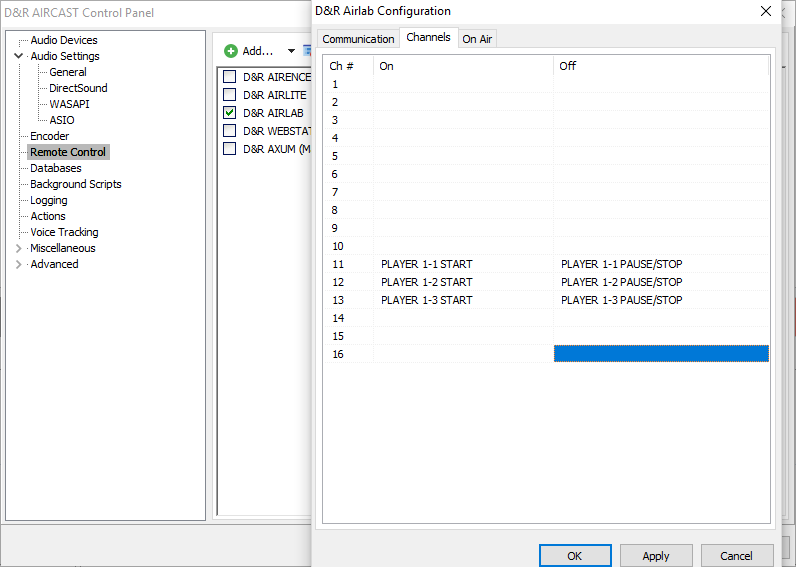
These have to be configured on the Airlab his Channel positions.