
aircastwebstation2:start
Question: How do I setup Aircast to work with my Webstation
Answer: please follow the steps at this link
Easy setup manual Aircast with an Webstation 2/3
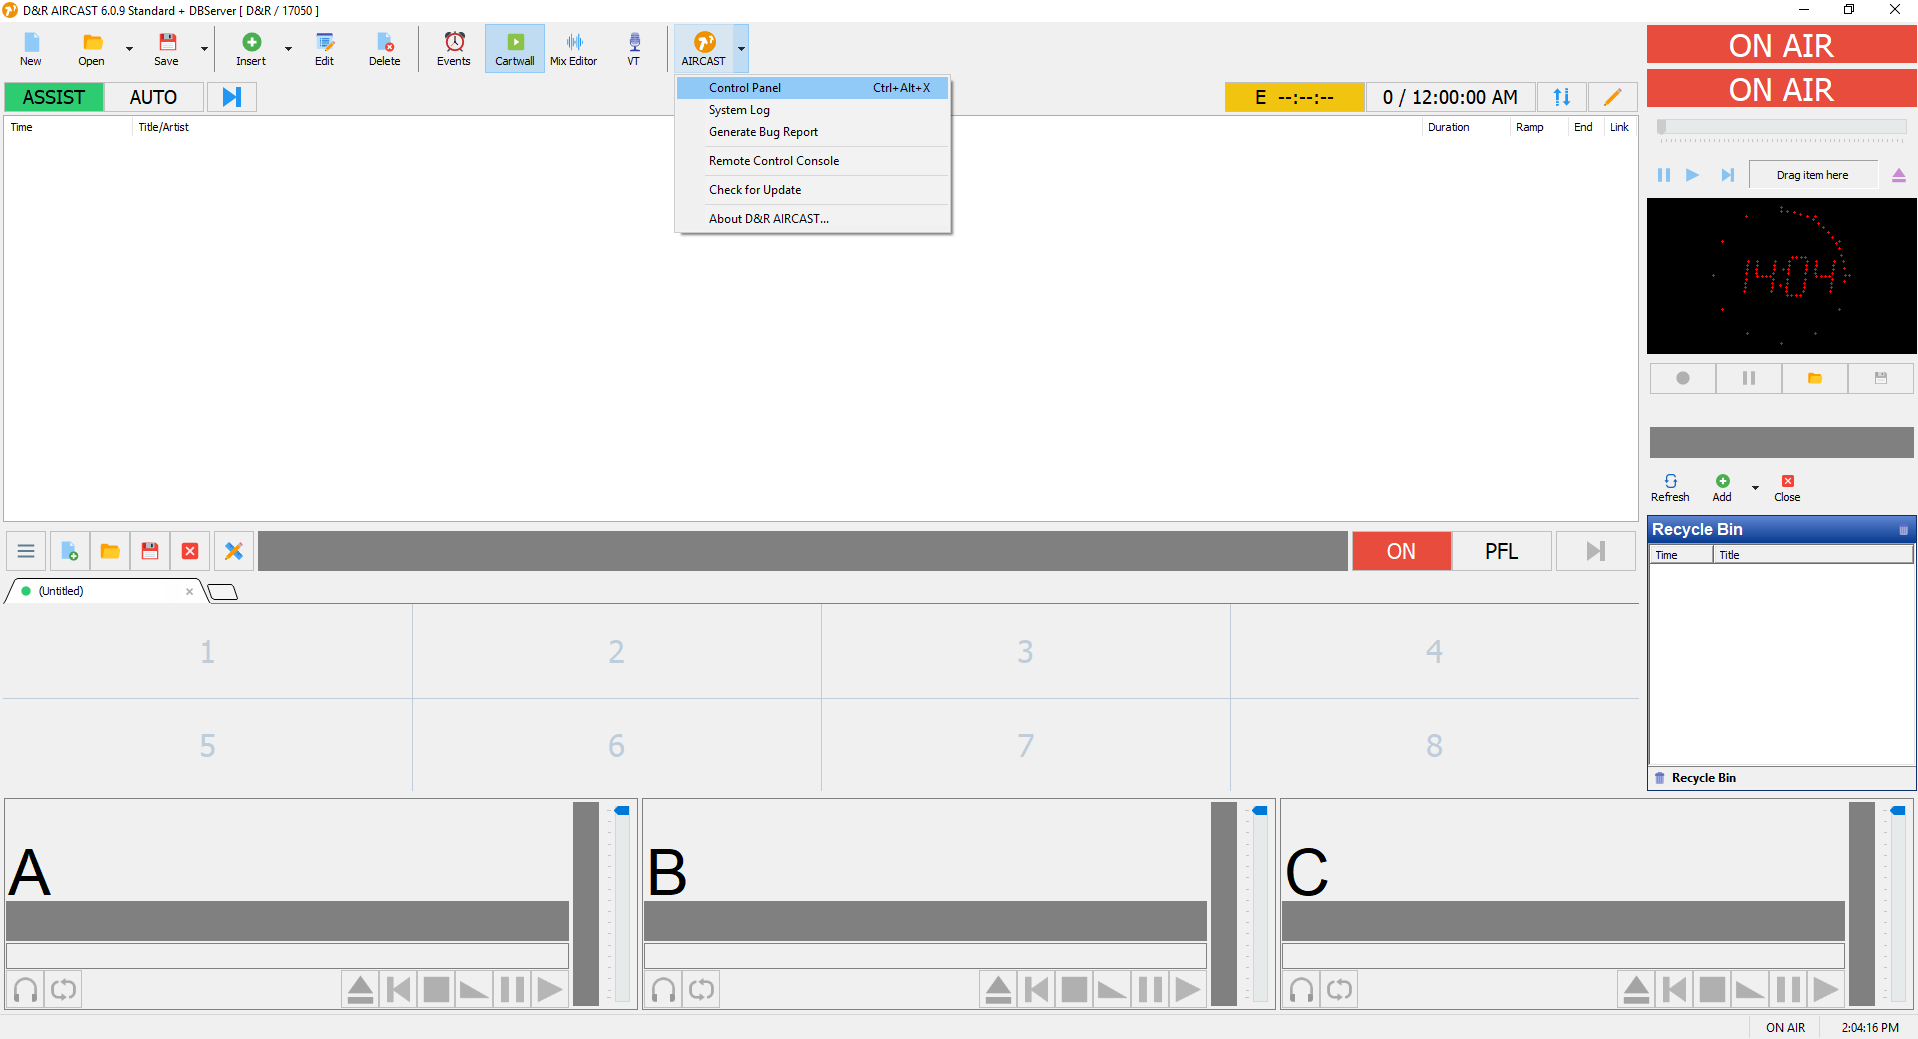
For the non visual configuration you can go to the Aircast Control panel.
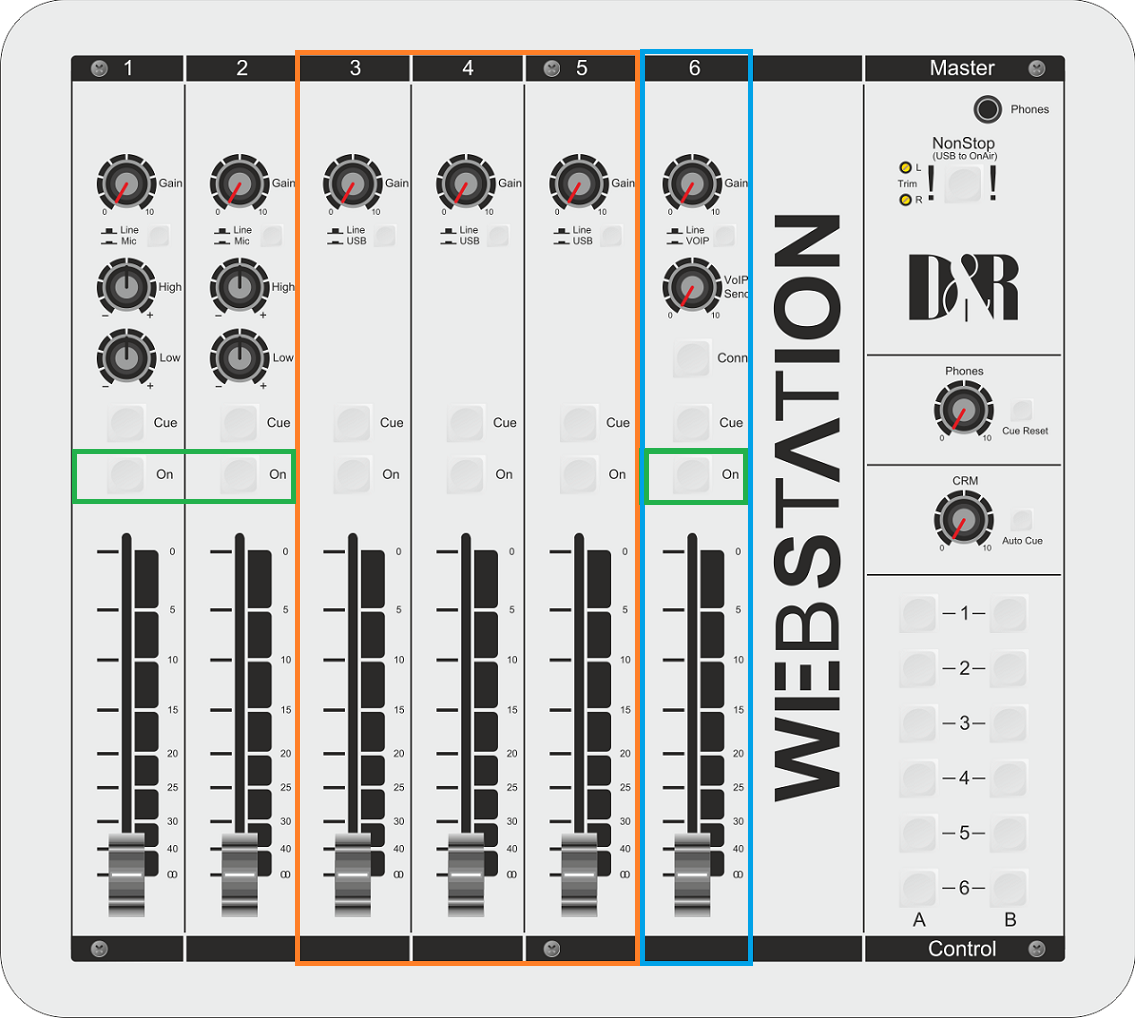
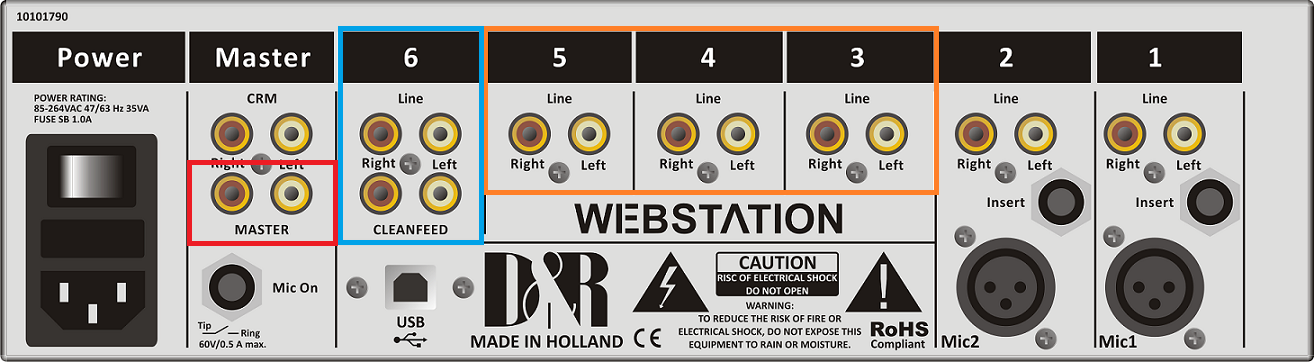
On this front and backplane you see the three inputs channels of the Webstation in Orange.
The output Master in Red.
The voicetrack bus in Green.
Also the Voip channel in Blue is returned on USB.
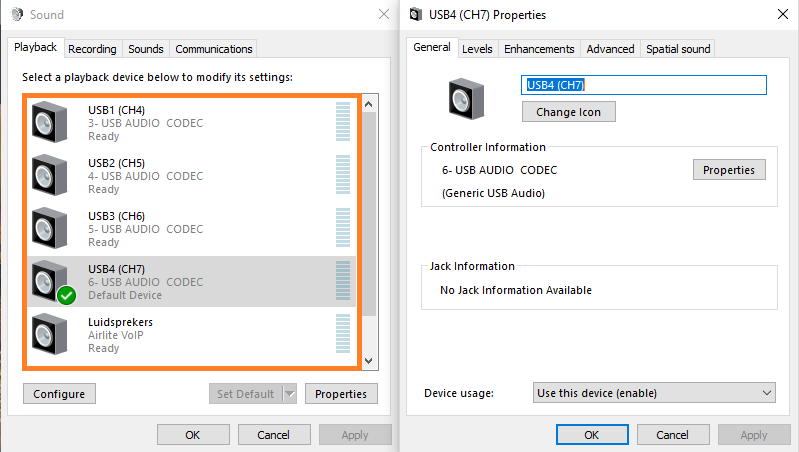
Here you see the Windows Sound settings with the corresponding inputs highlighted with colors to easily recognize them.
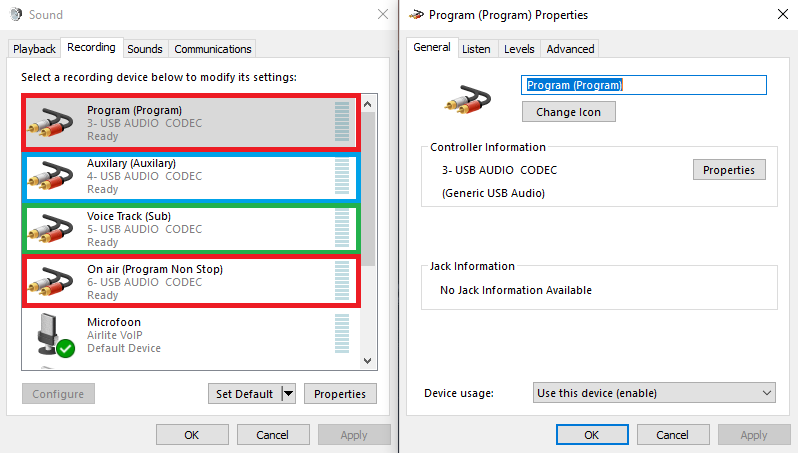
Here you see the Windows Sound settings with the corresponding outnputs highlighted with colors to easily recognize them.
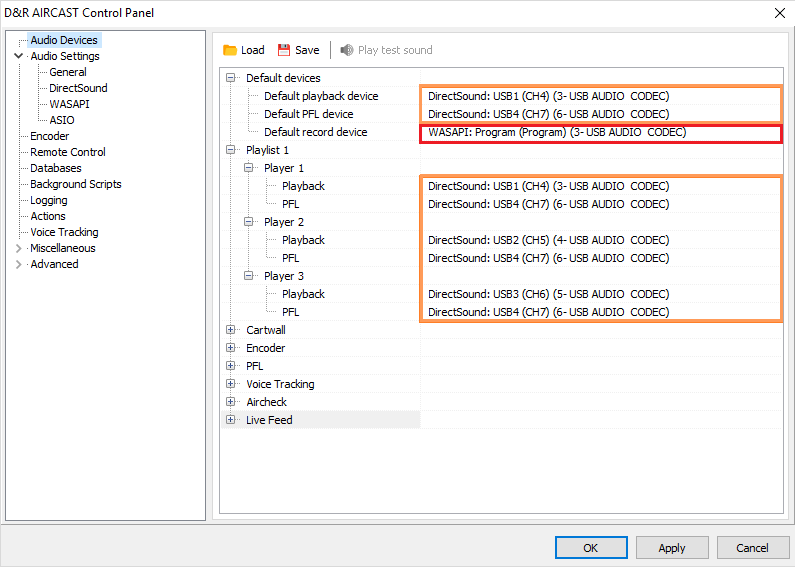
- Player 1 plays to Channel 1 and it’s PFL goes to Channel 4
- Player 2 plays to Channel 2 and it’s PFL goes to Channel 4
- Player 3 plays to Channel 3 and it’s PFL goes to Channel 4
- The standard playout goes to Channel 1, the standard PFL goes to Channel 4, the standard recording device is Program (Non Stop)
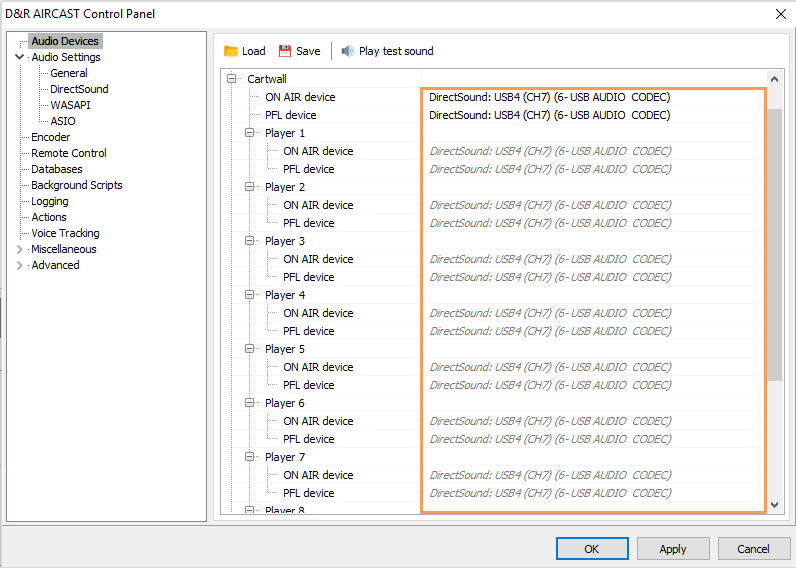
- All the Cartwall players playout to channel 4
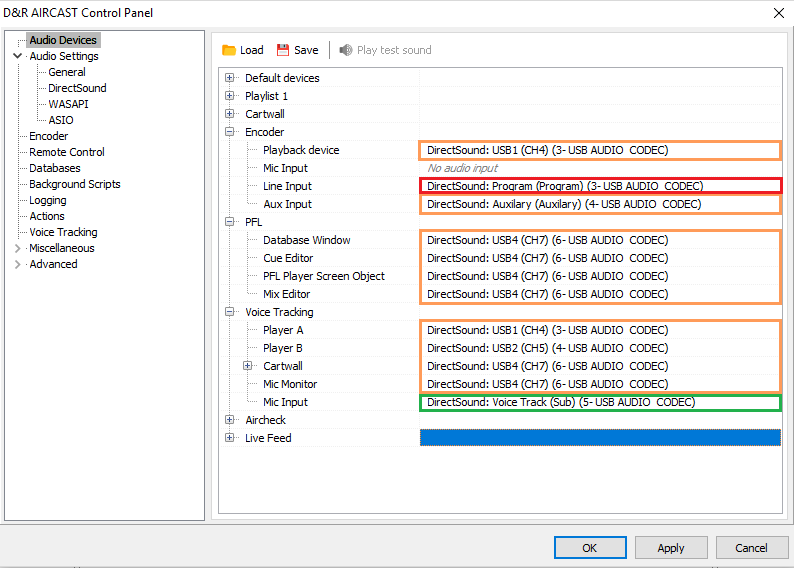
- To listen to the encoder you can select Channel 4
- it’s line in signal comes from the Prog (Non Stop).
- as an Aux signal it receives the Aux.
- The PFL player comes out of Channel 4.
- For the Voicetrack recorder we tell Aircast that Player A is Channel 1.
- Player B is Channel 2.
- Cartwall is Channel 4 as well as the Mic Monitor.
- The Microphone input is the Sub / Voice track bus.
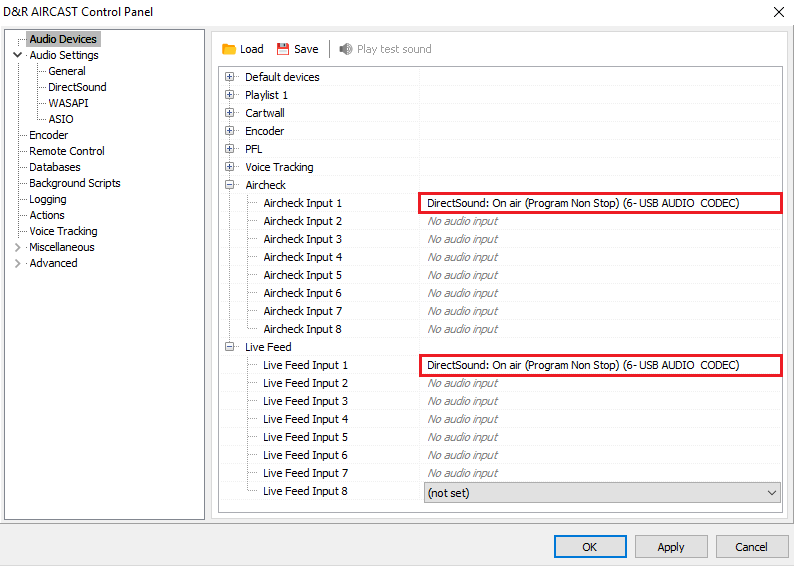
- To record the Aircheck you can use different inputs.
- in this case we selected Prog (Non Stop) but this can also be the on air input at an Airlite.
- The Live Feed uses the Prog (Non stop) input.


aircastwebstation2/start.txt · Last modified: 2020/06/12 12:04 by support