
Table of Contents
Multiple Axum settings
| Question: How can I configure my Axum to control Aircast? |
|---|
| Answer: Link: follow the instructions on this page |
| Question: How can I move the Motorfaders by pressing a button? |
|---|
| Answer: Link: follow the instructions on this page |
| Question: How can I add the Source gain function to other cards then the MicAD card? |
|---|
| Answer: Link: follow the instructions on this page. |
| Question: How can I add the Destination gain function to an output card? |
|---|
| Answer: Link: follow the instructions on this page. |
| Question: How can I change the color of the LED's in the switches? |
|---|
| Answer: Link: follow the instructions on this page. |
| Question: How can I configure an insert function? |
|---|
| Answer: Link: follow the instructions on this page. |
| Question: How can I configure an aux function? |
|---|
| Answer: Link: follow the instructions on this page. |
| Question: How can I configure a headphone Split function? |
|---|
| Answer: Link: follow the instructions on this page. |
| Question: How can I configure a preset to switch to Non Stop mode? |
|---|
| Answer: Link: follow the instructions on this page. |
| Question: How can I configure Talkback? |
|---|
| Answer: Link: follow the instructions on this page. |
Motorfader

Changing the function of the Start and Stop buttons at the Surface configuration of each UI (User Interface) to Module x: Fader on and Module x: Fader off will make the fader go up or down when pushing the button.

When you change the Start and Stop Trigger at the Source Configuration to Module fader on and Module fader off the Axum will still send out the fader Start and Stop function to the configured GPO's.
Gain
Source Gain

This example shows how the source gain can be added to other cards then the MicAD.
Destination Gain
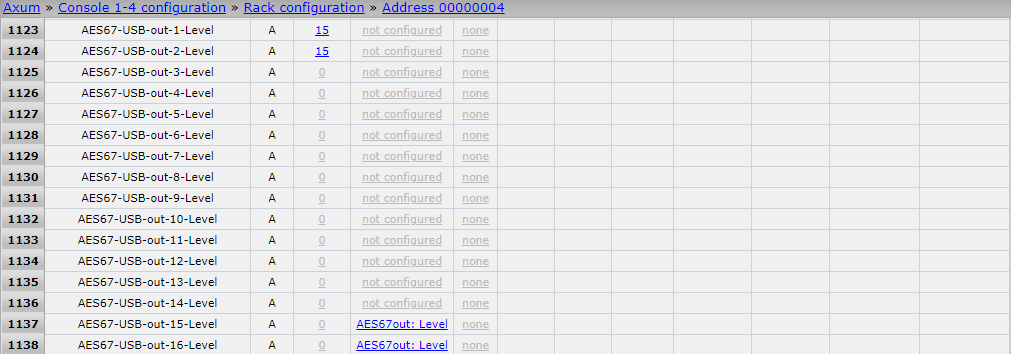
This example shows how the destination gain can be added to output cards.
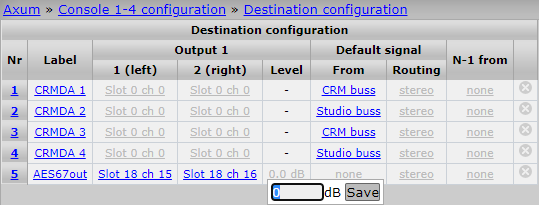
The level setting will now be available at the Destination configuration.
Color
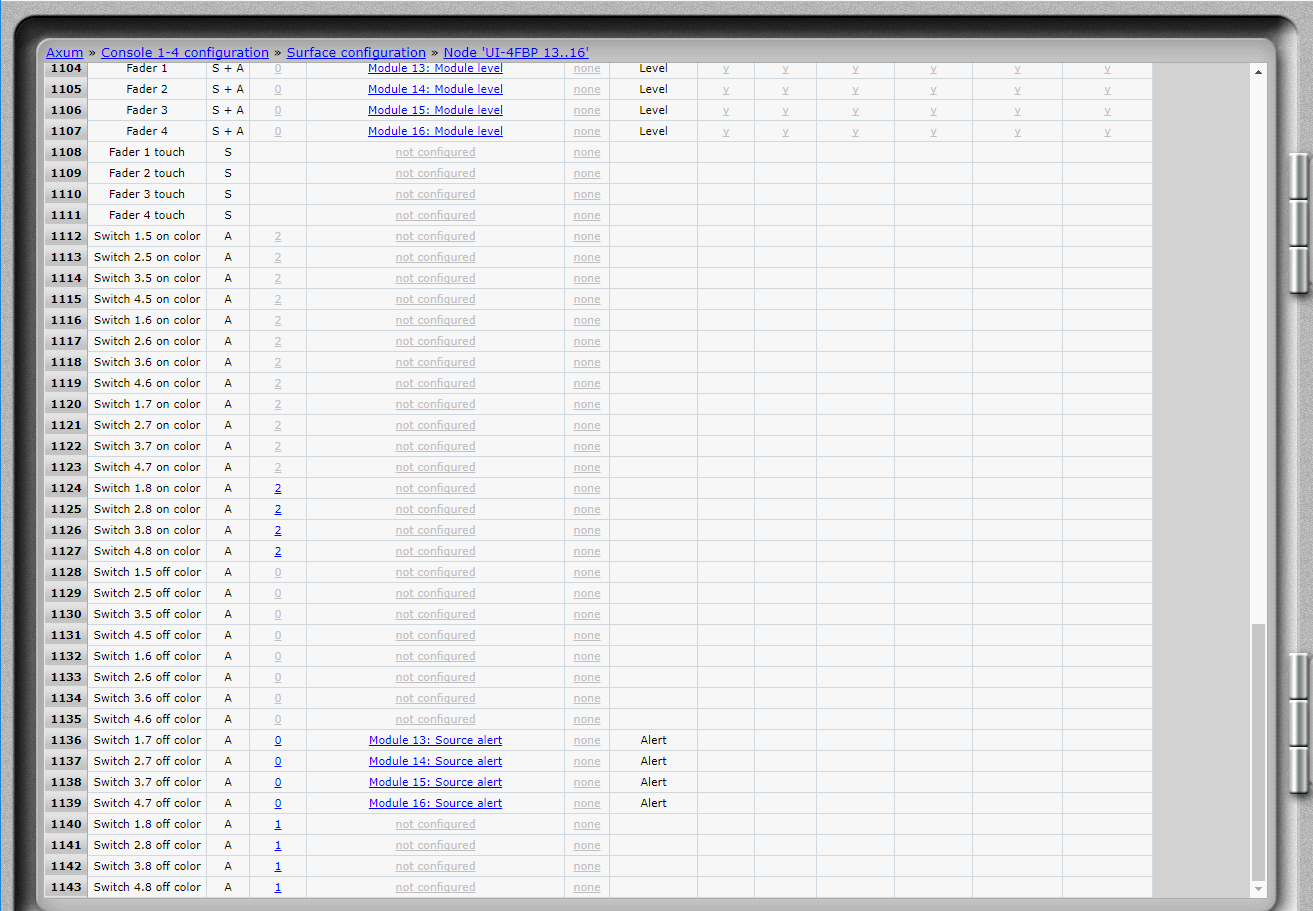
By changing the “Switch x.x on color” or “Switch x.x off color” to 1 = Green, 2 = Red or 3 = Orange you can change it's color. Setting it to 0 wil switch it “Off”.
Insert
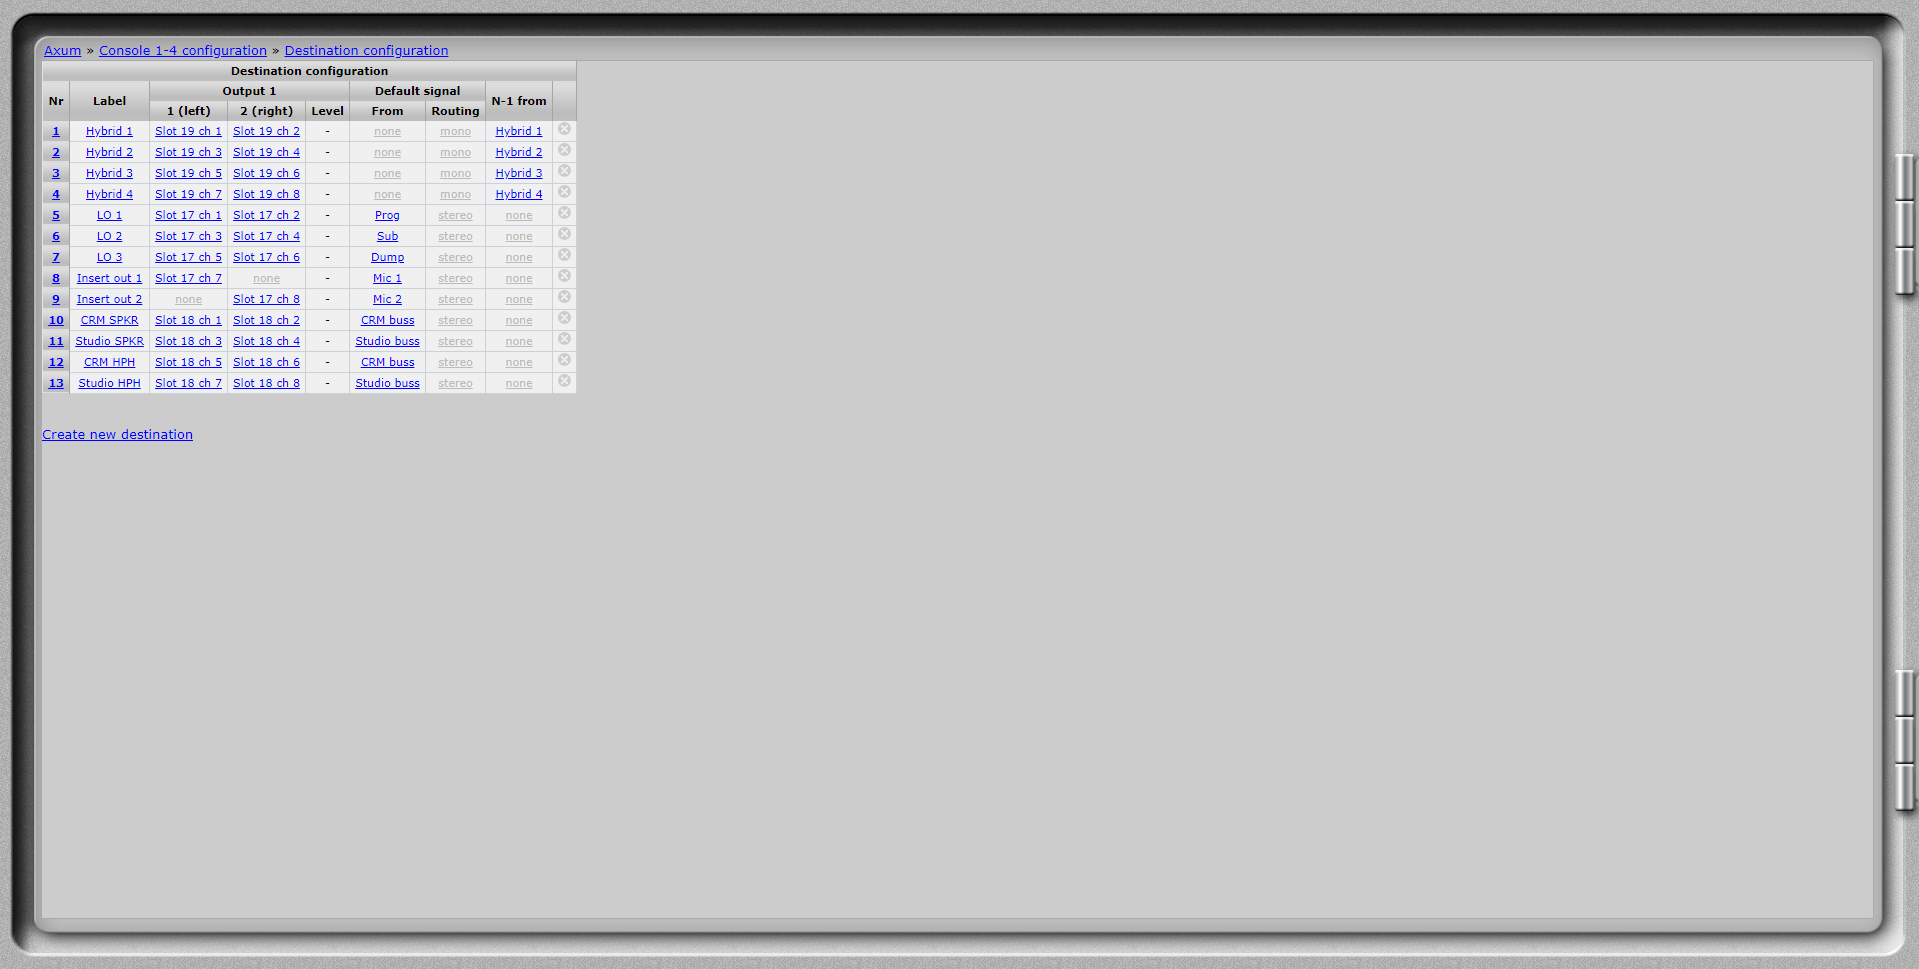
Create an output that sends the “Mic 1” to the “Left” output only.
Create a second output that sends the “Mic 2” to the “Right” output only.
These can be connected to the inputs or your effect equipment.
Create an “Insert” input that picks the “Left” and “Right” channel from the same “Slot x ch x” input to make it a stereo input.
Create a second “Insert” input that picks the “Left” and “Right” channel from the other same “Slot x ch x” input stereo input.
These can be connected to your effect outputs.
Aux
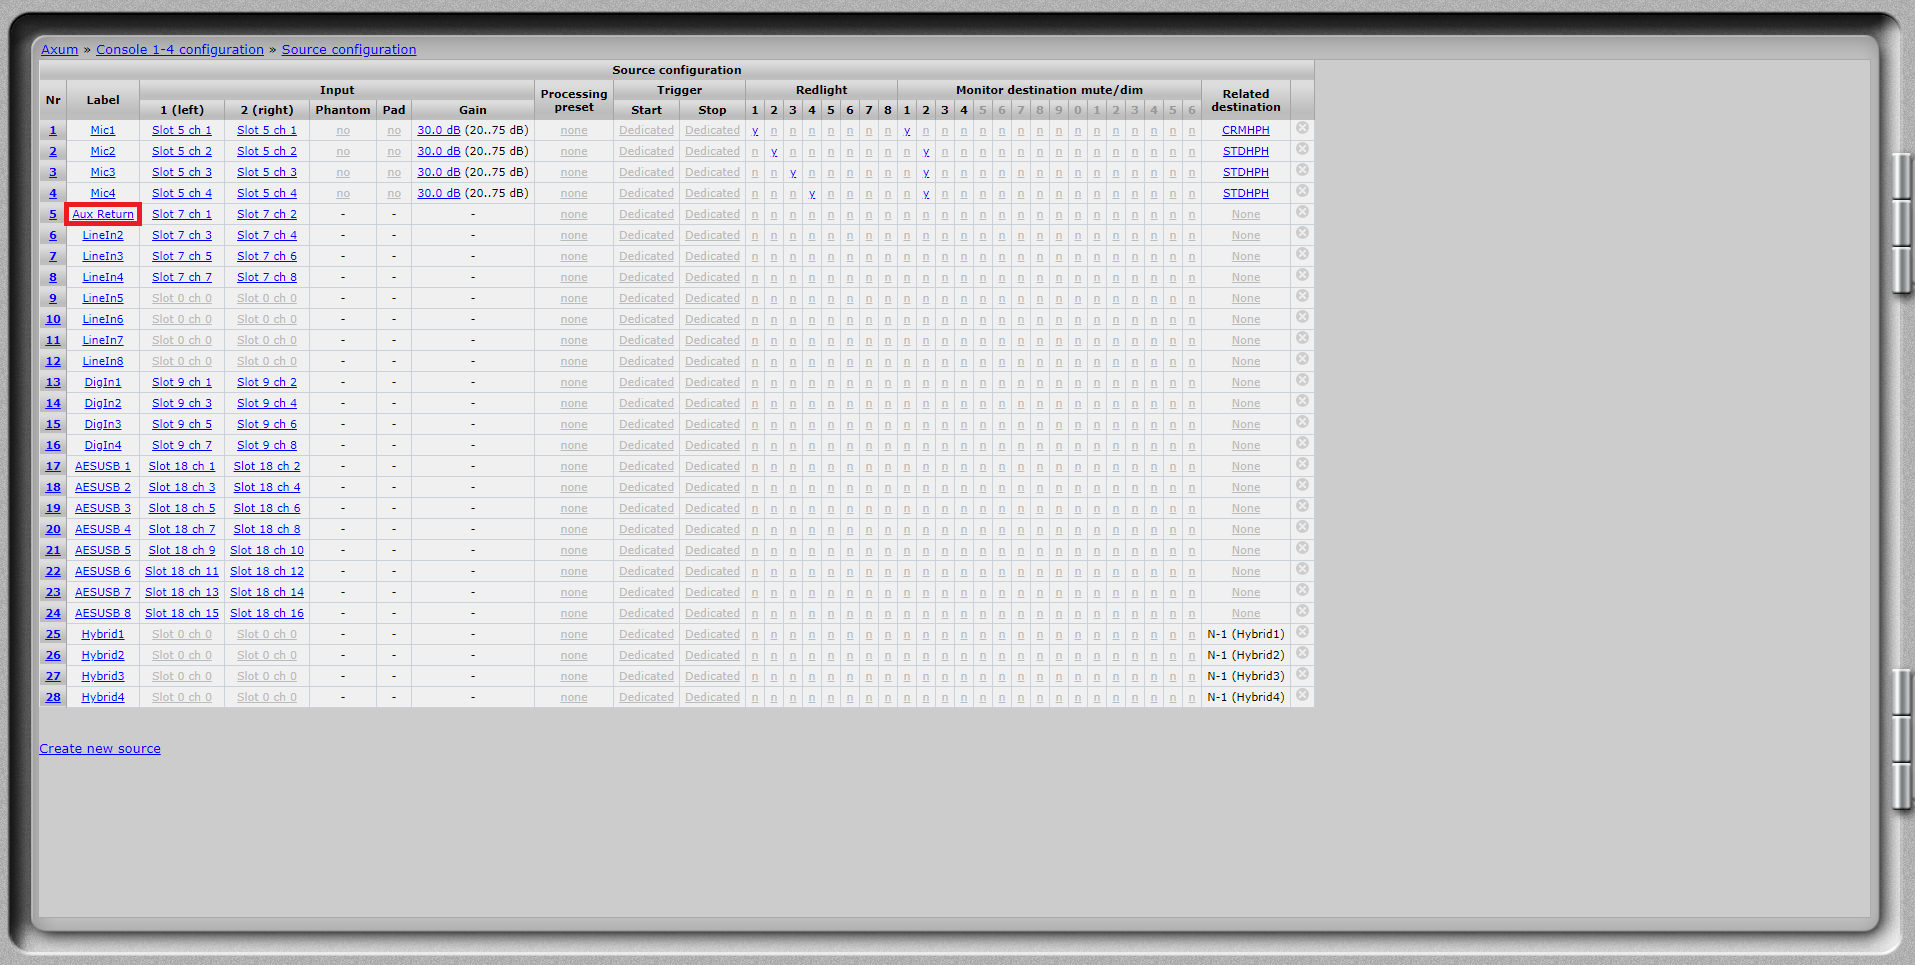
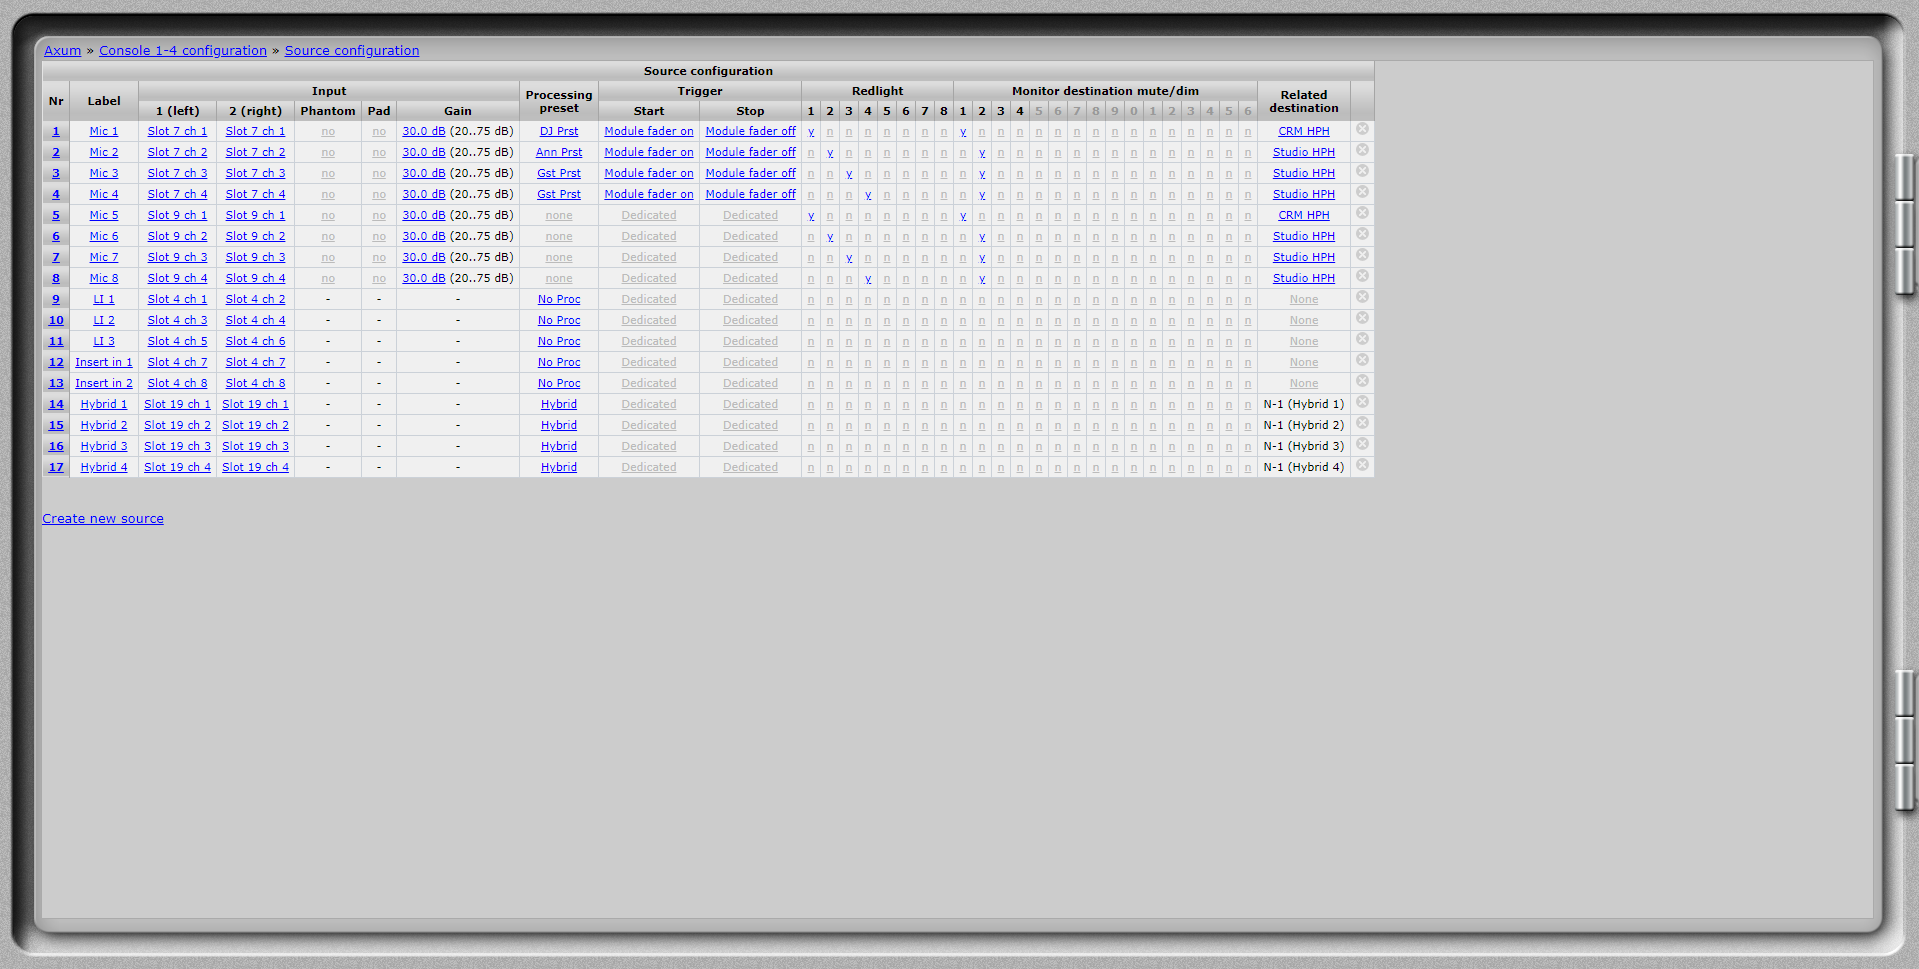
At the “Source configuration” you'll have to rename a desired input as “Aux Return”.
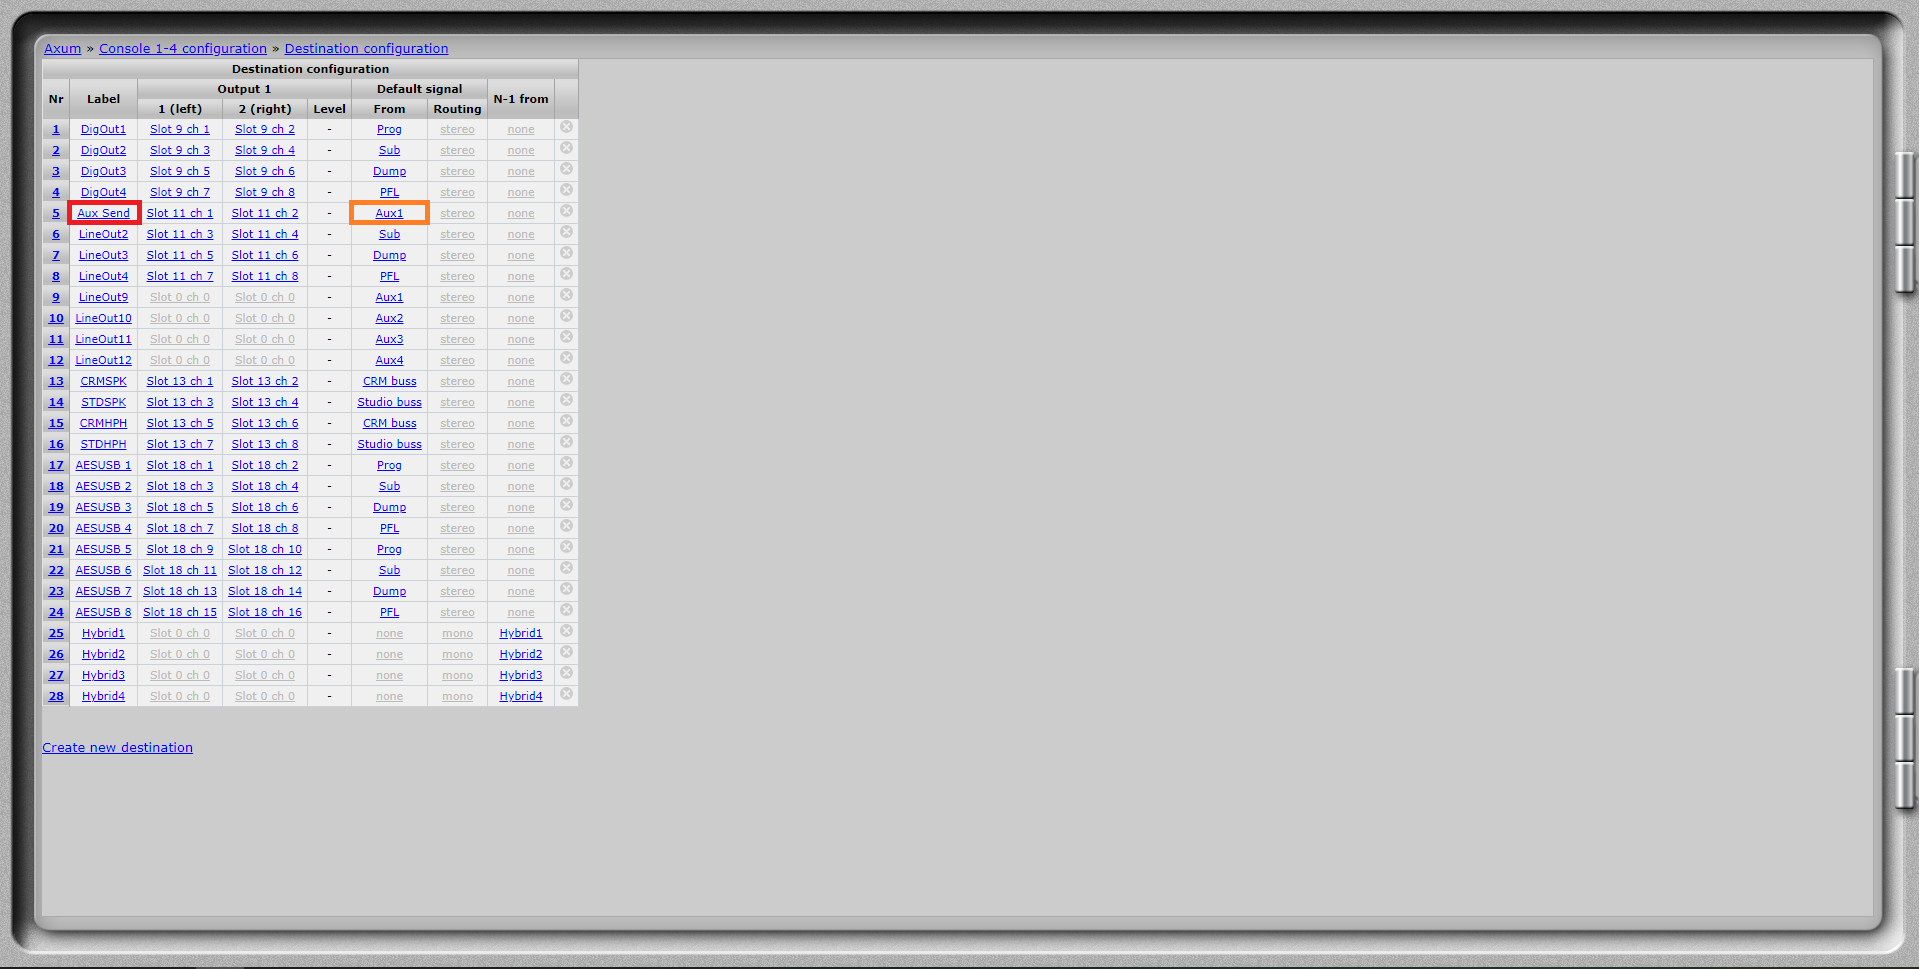
At the “Destination configuration” you'll have to rename a desired output as “Aux Send”.
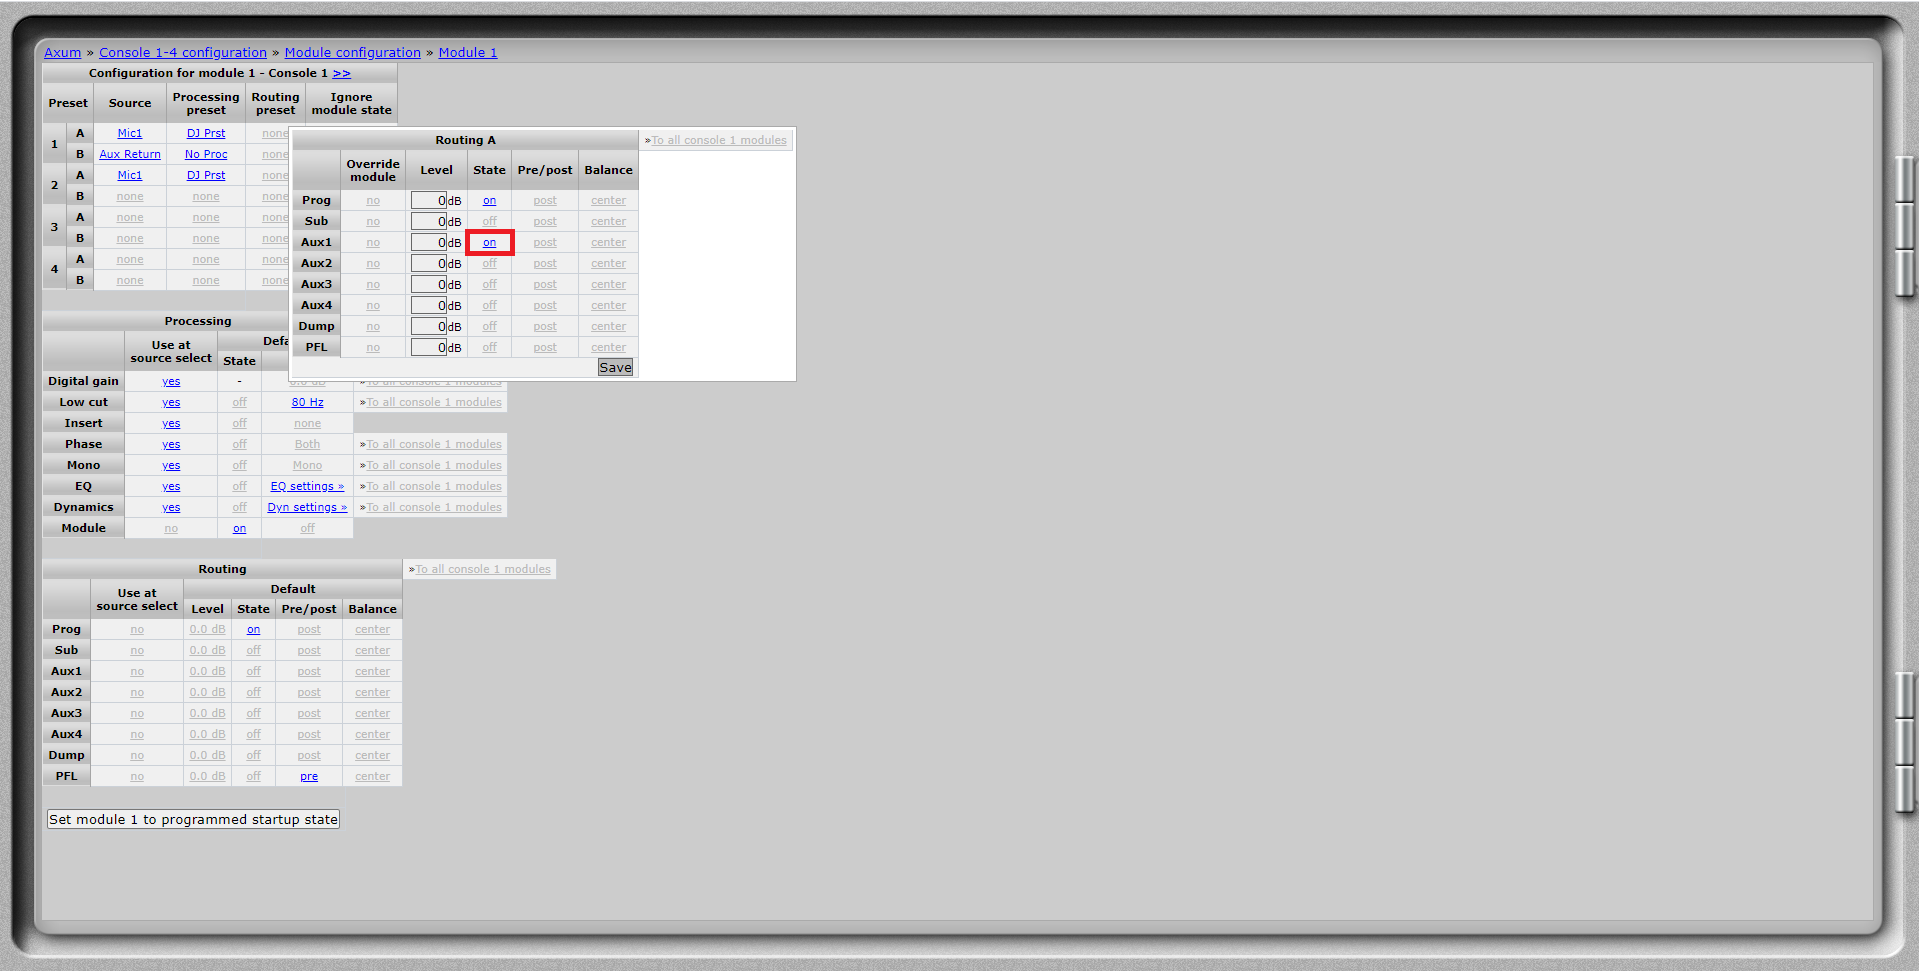
At the “Module configuration” of each module you can set the “Aux1” to “On” if you want to switch the “Aux1” in a preset.
It is also possible to manually set the “Aux1” to “On” / “Off” at the “Control surface”.
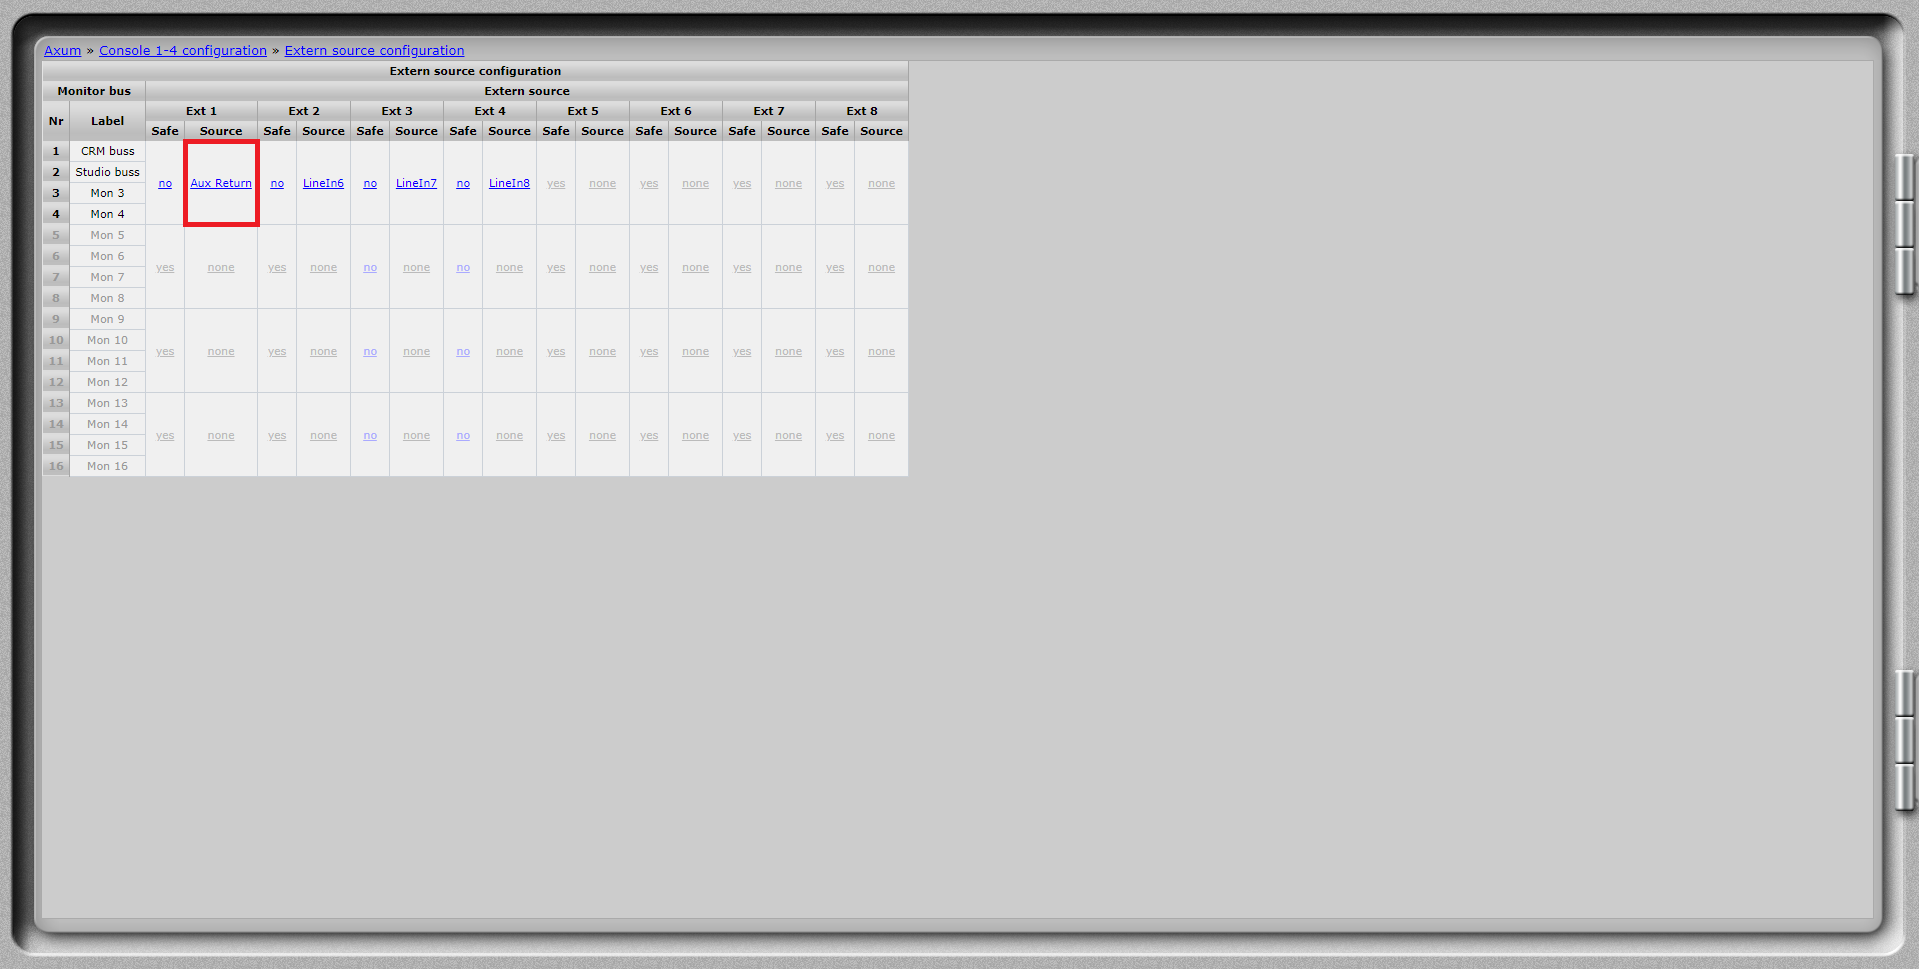
It is possible to use the “Aux Return” as “Extern source” this way it is only available at the “Cue” section of the CRM and Studio outputs.
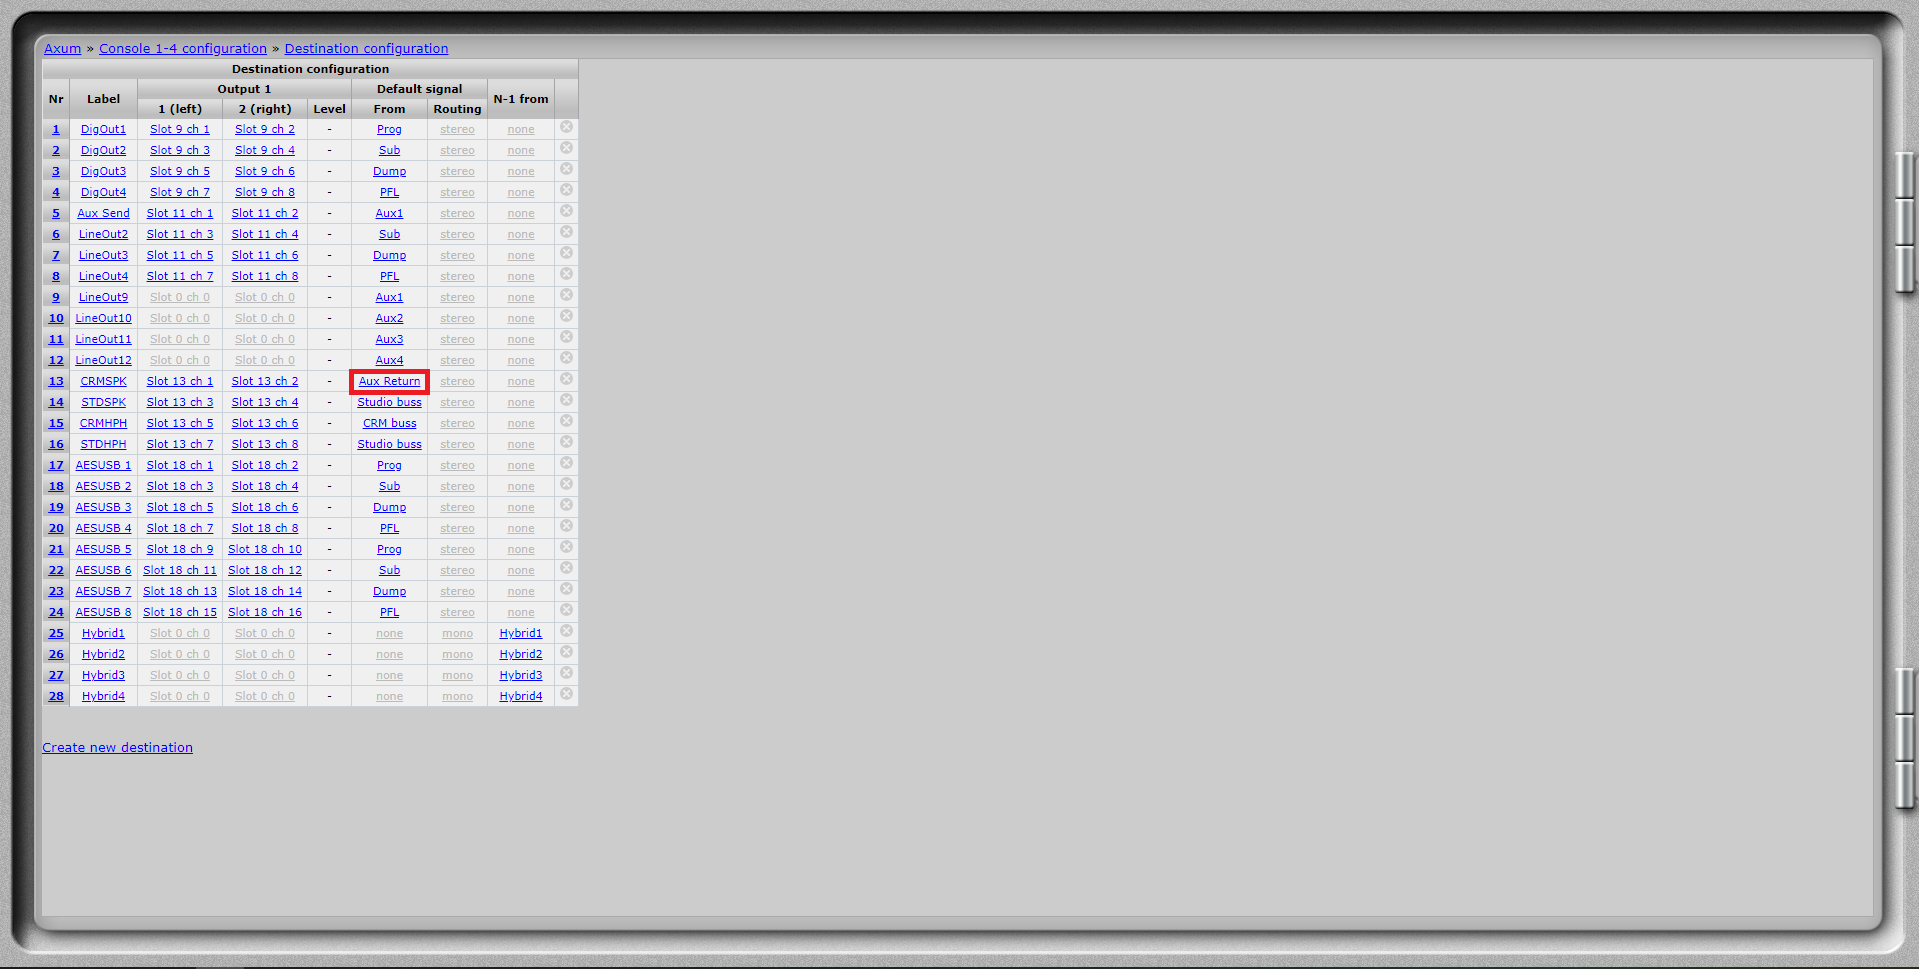
It is also possible to hard route it to a specific output.
Split
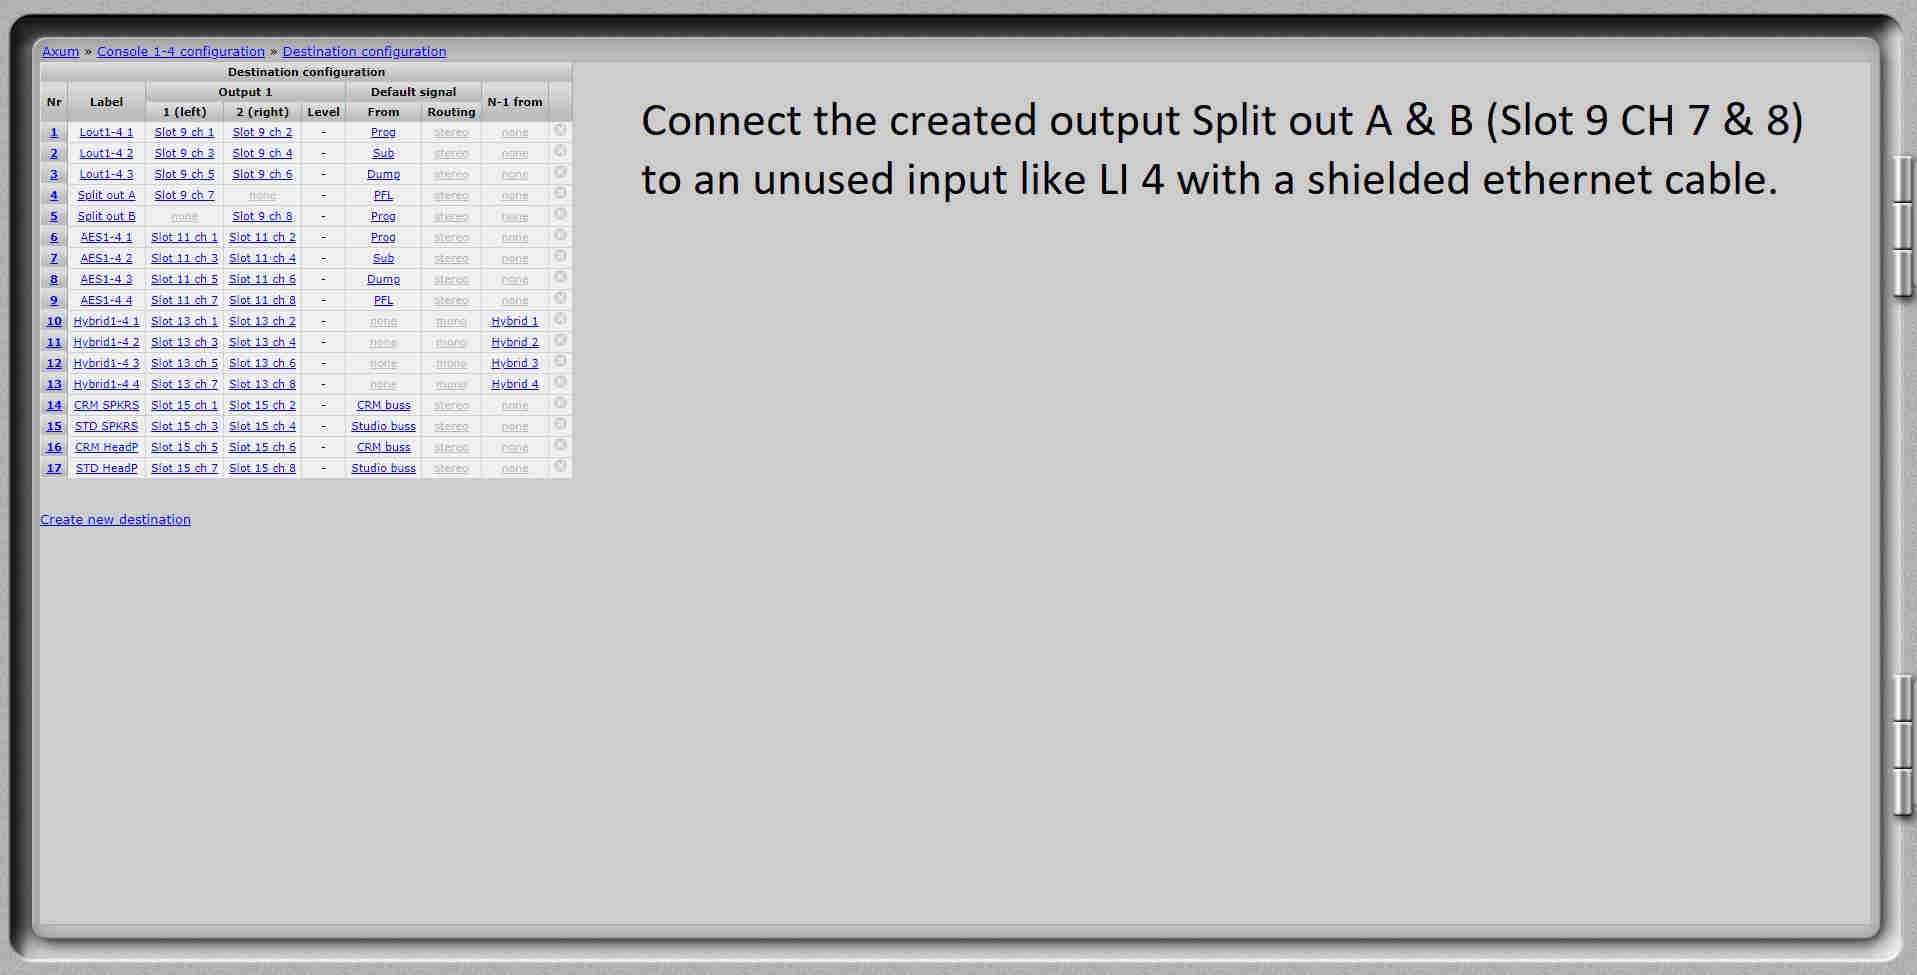
Create an output (Line or AES) with on the Left side the PFL and the right side no output. Now create a second line with the Left side no ouput and the right side the Prog as an ouput.
Connect this output to an input.
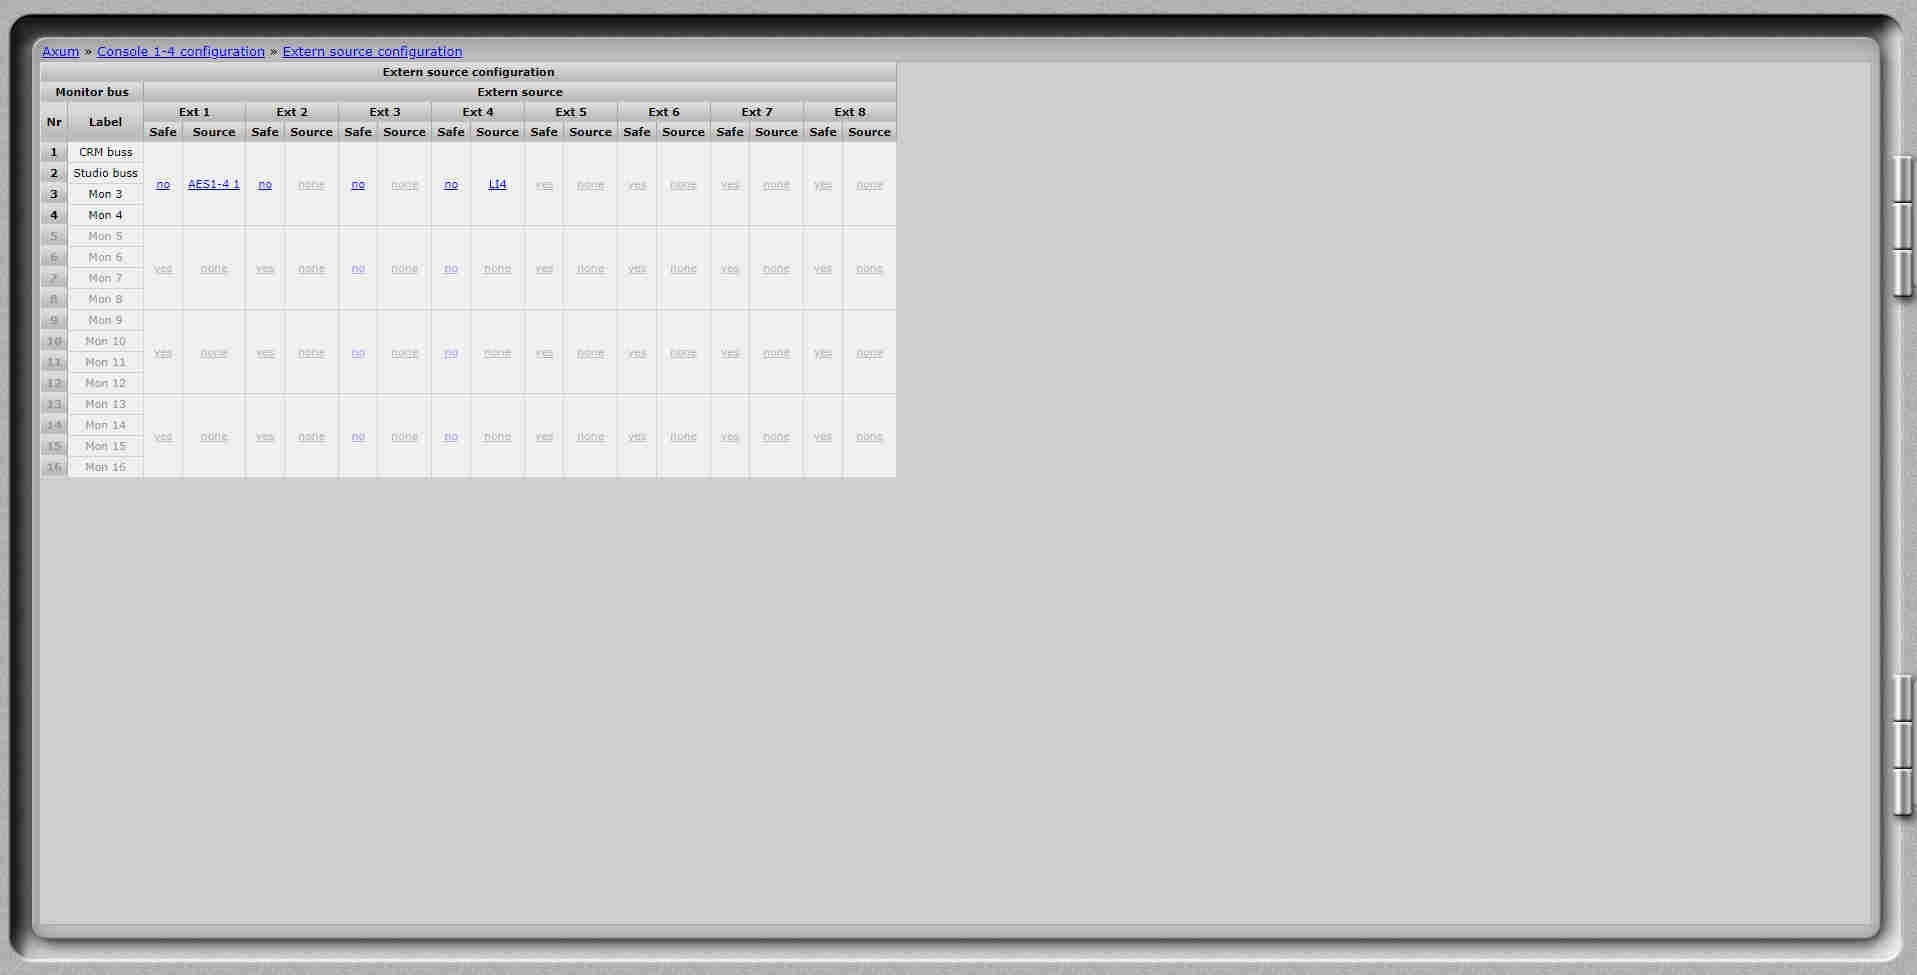
When you configure this input as an External input it can be directly routed to the headphone.
Nonstop
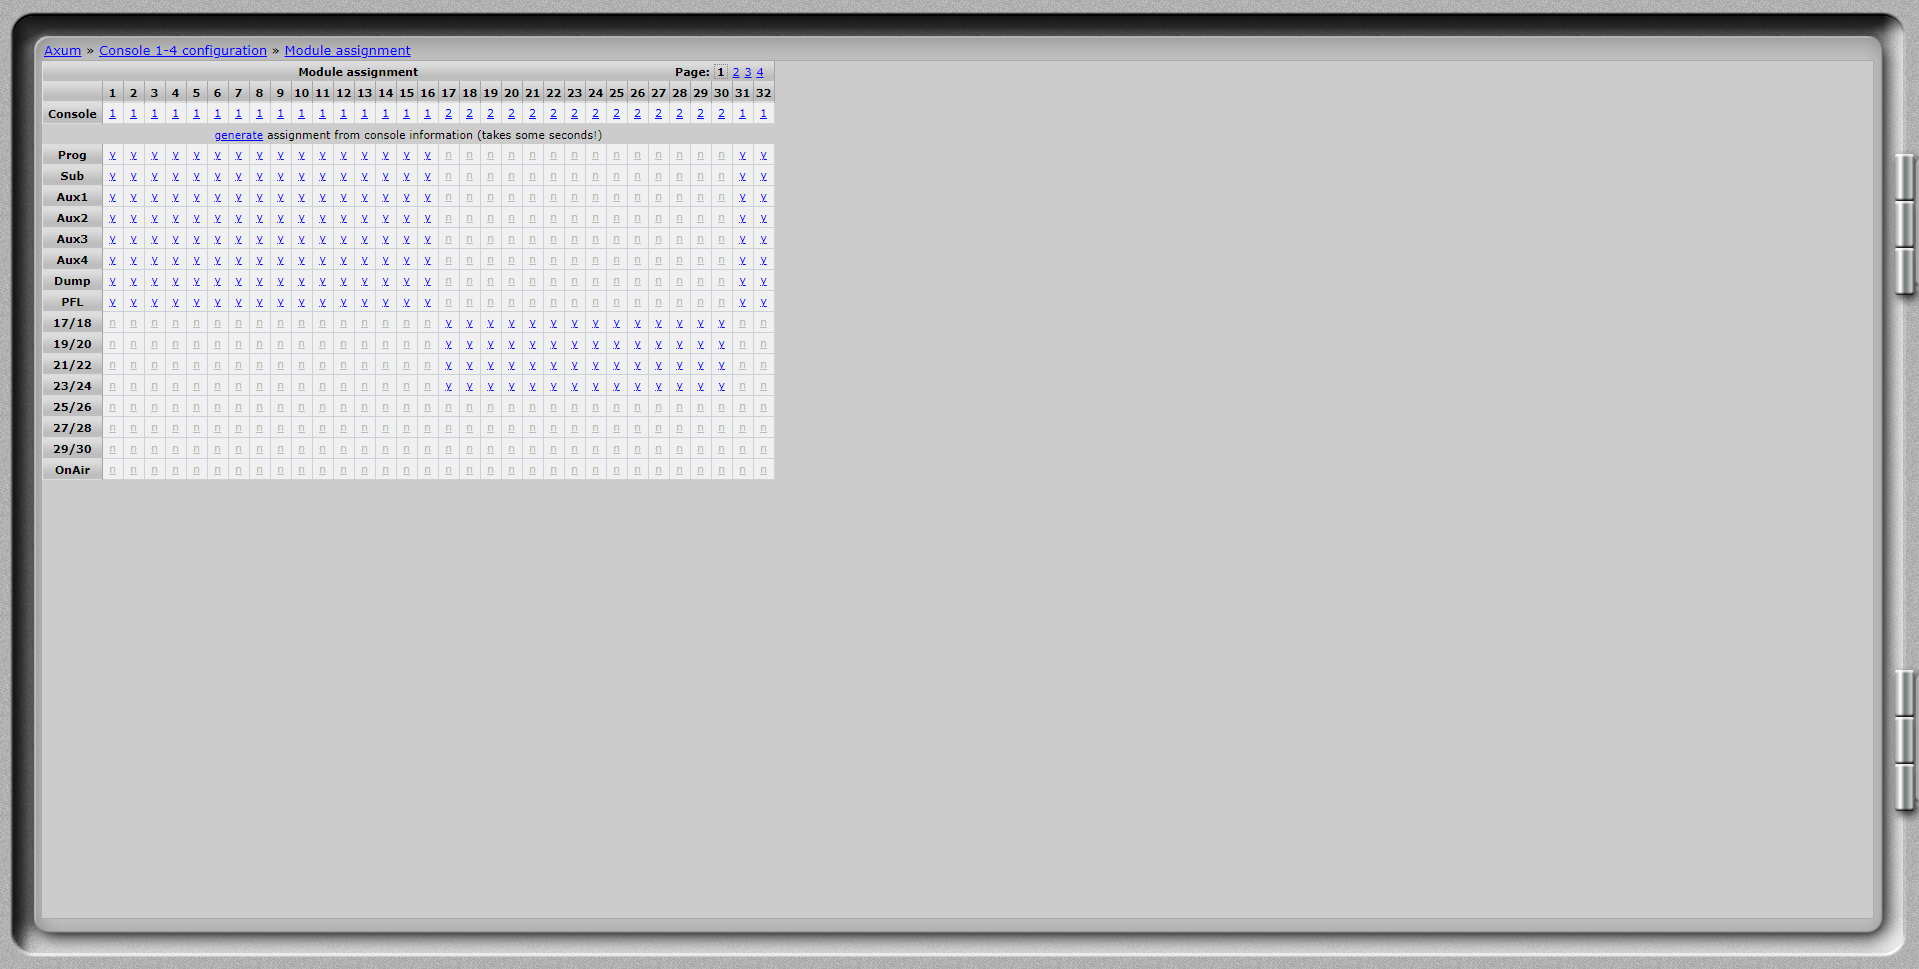
At the Module assignment page configure the prefered unused modules to work for the desired Console 1.
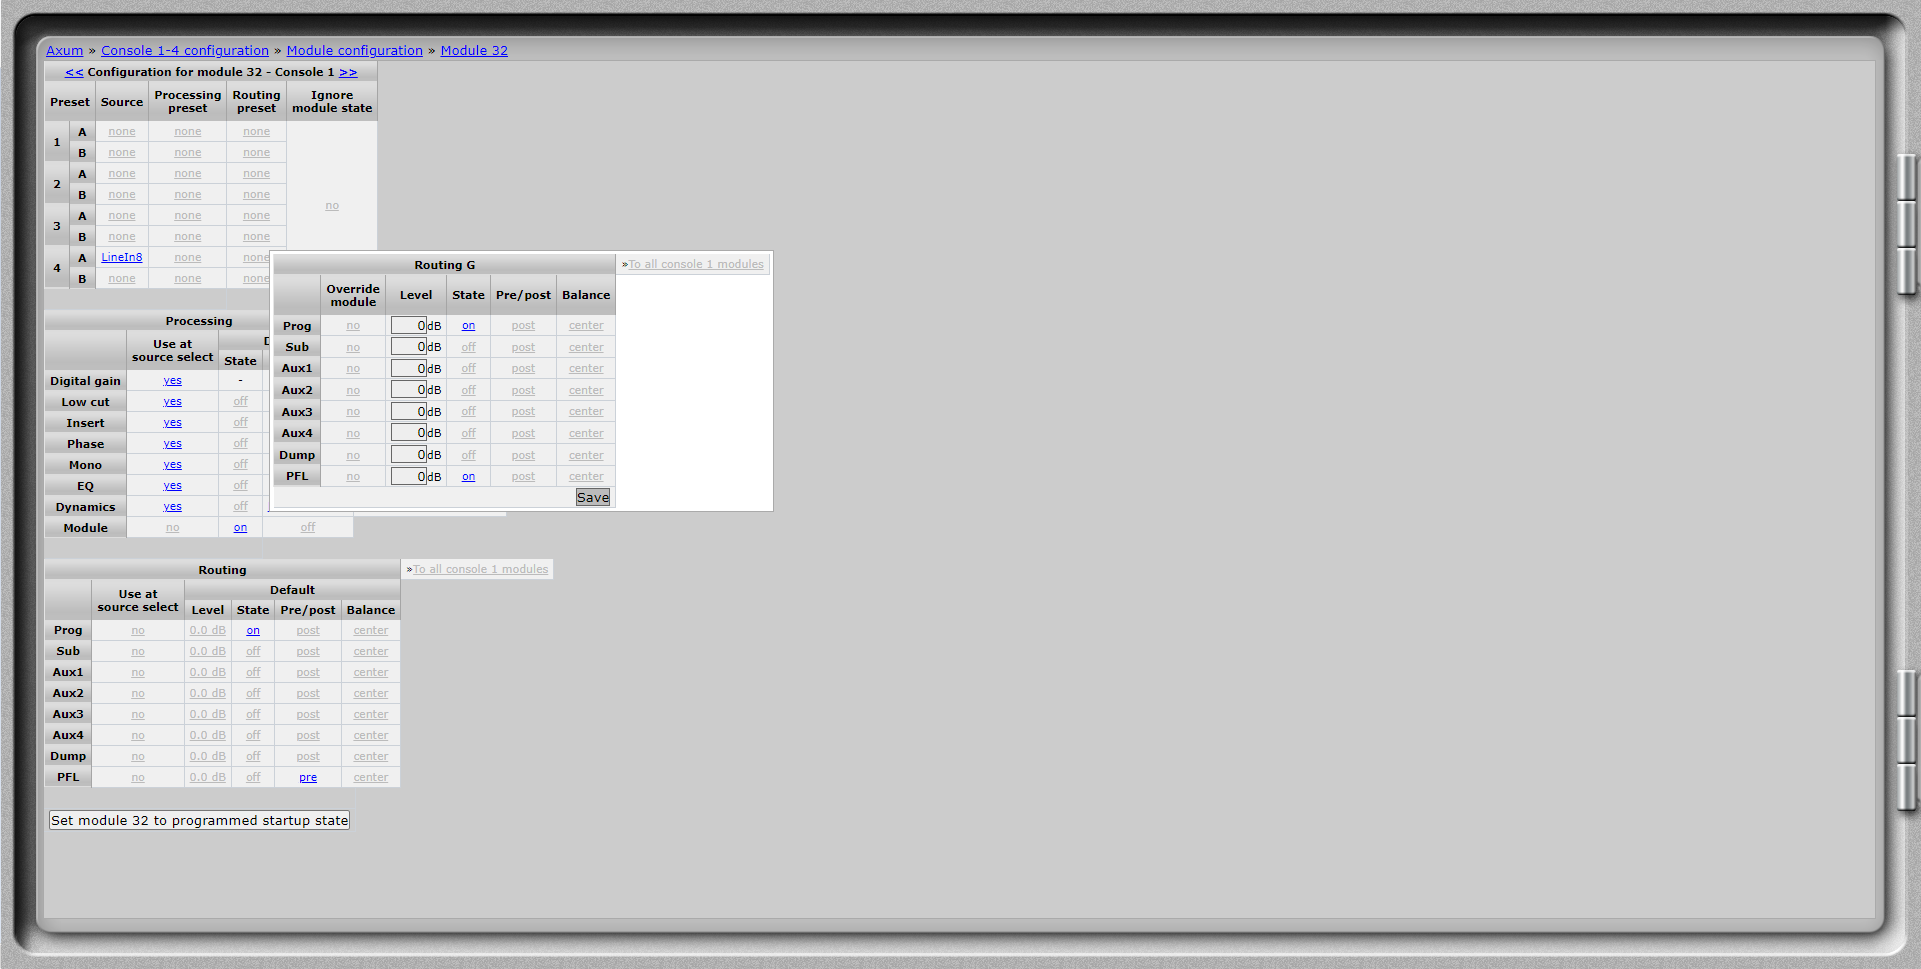
At the module configuration create a preset with the Non stop input which also sets on the Program bus for this input.
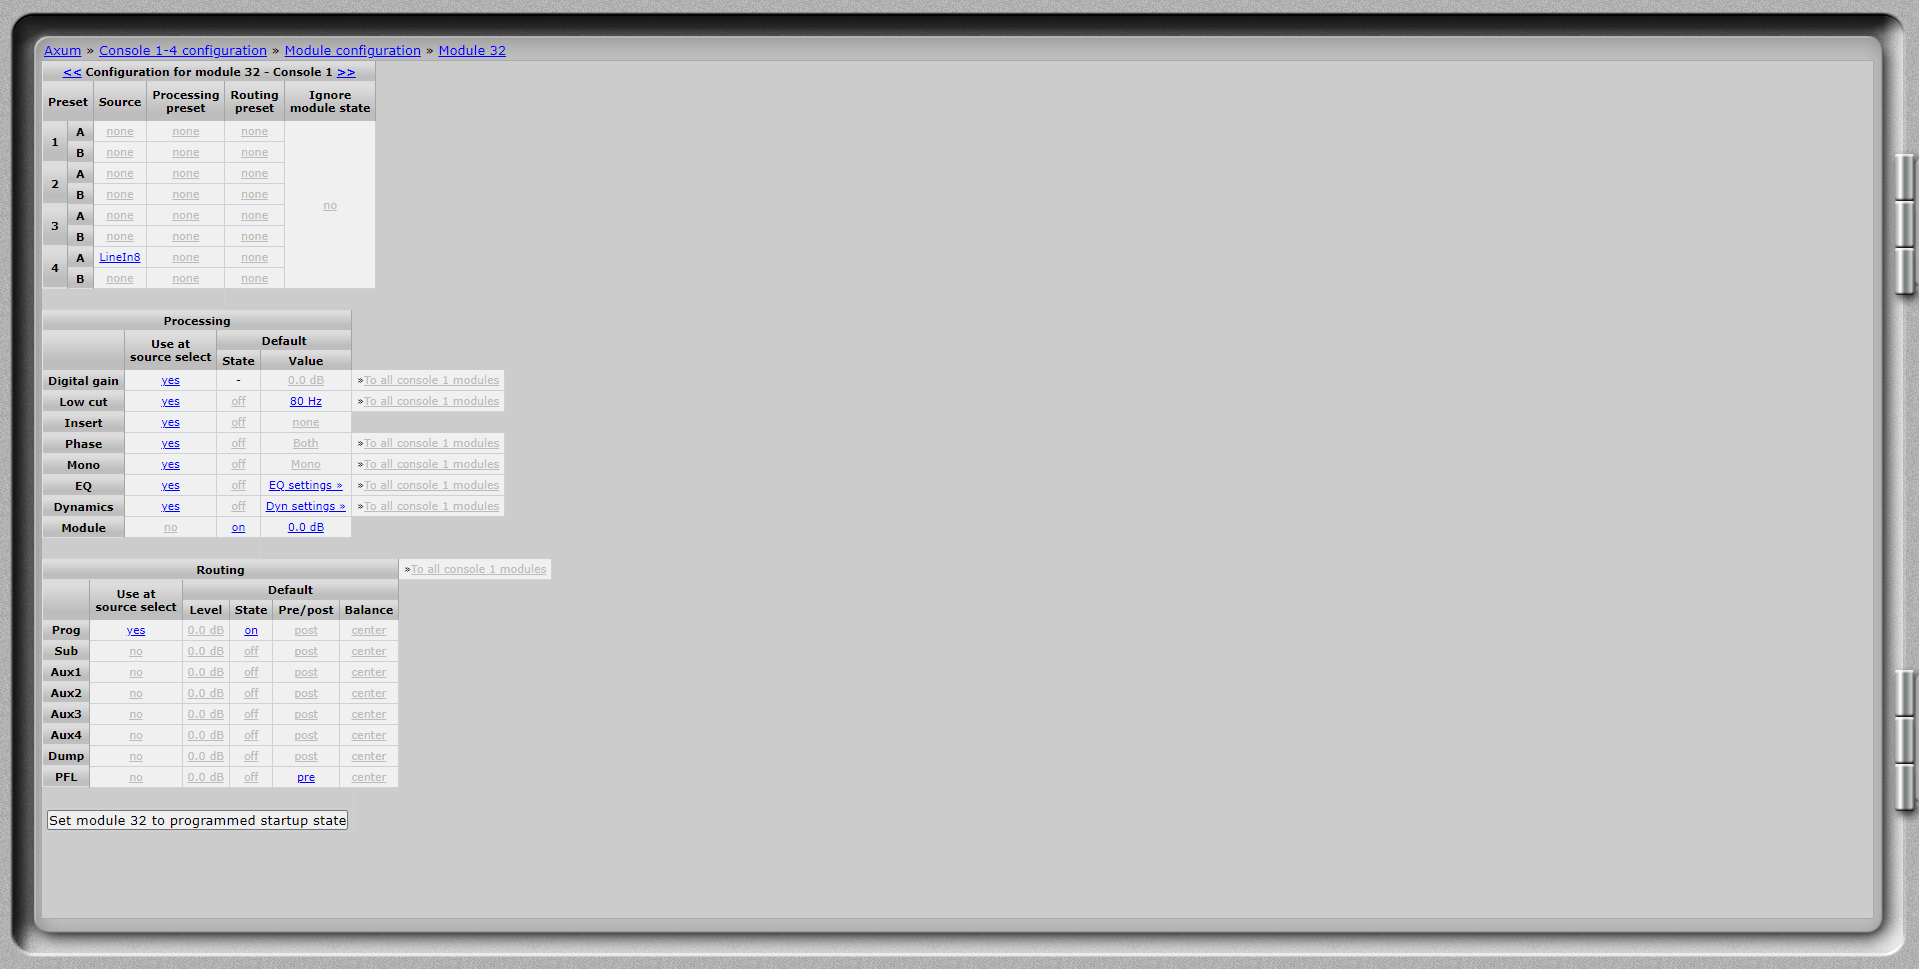
Let this preset also set on the Module On function and it's value.
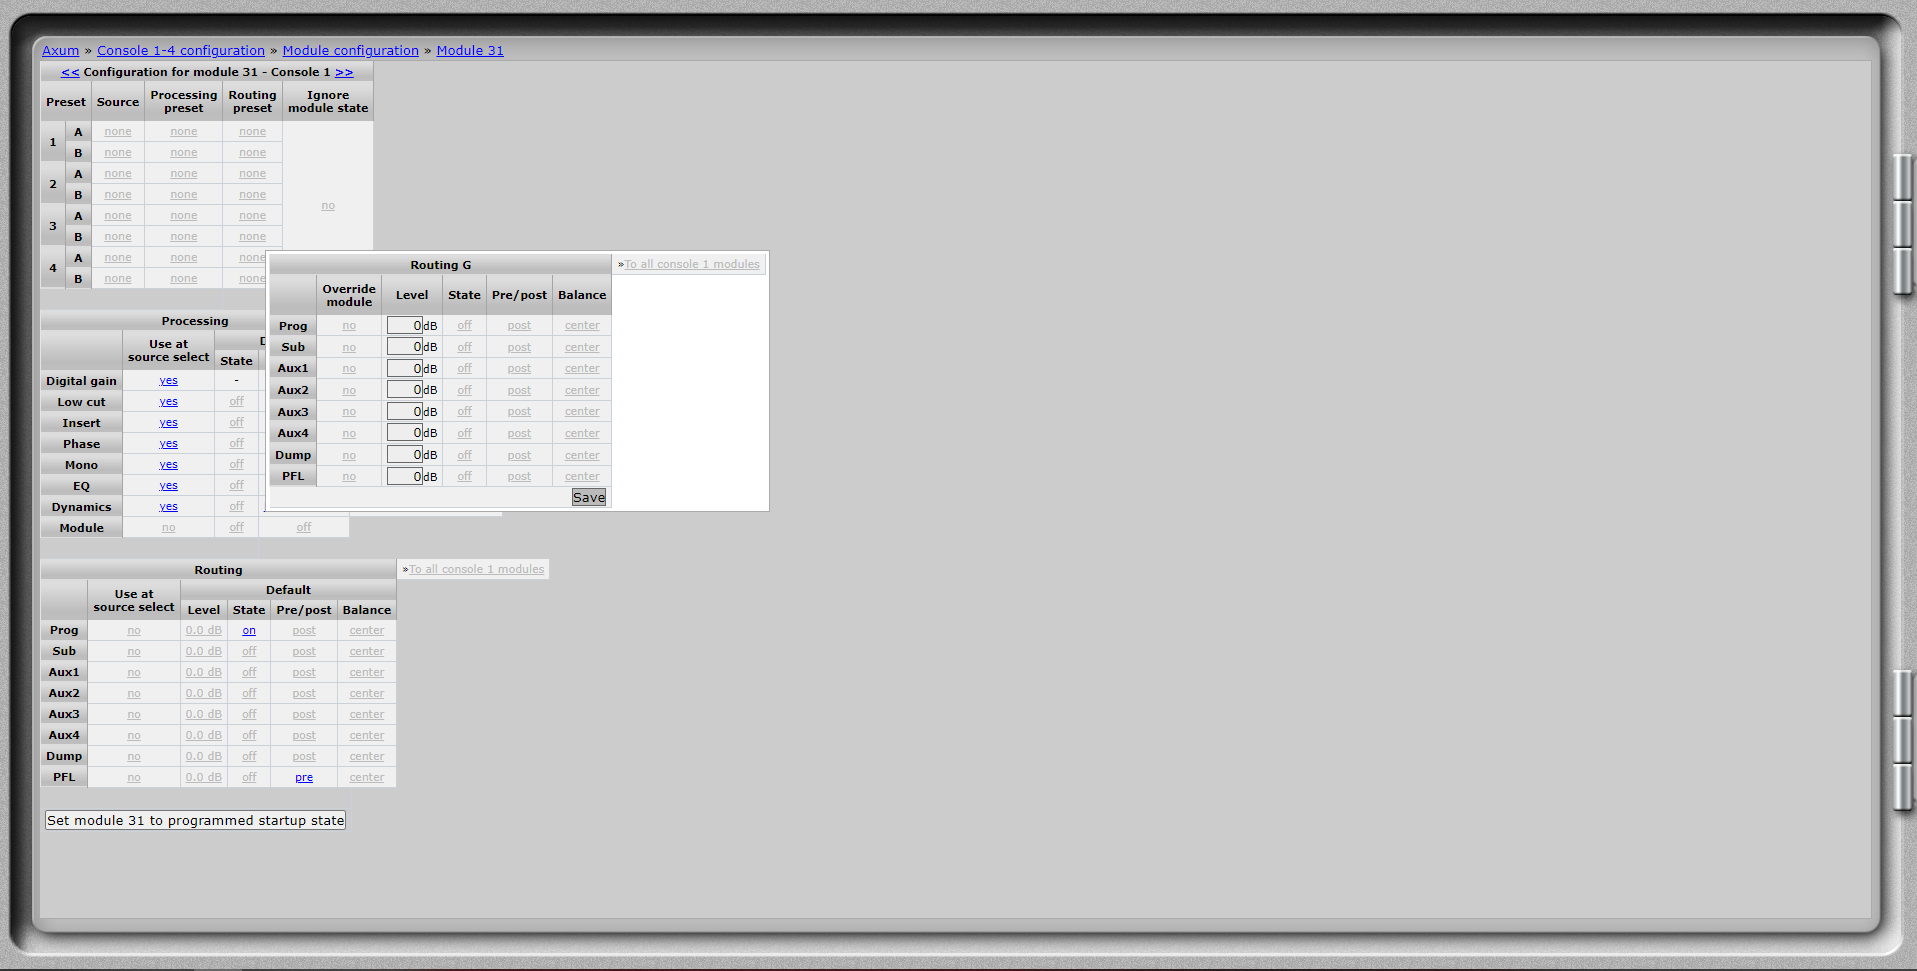
Turn off all other module inputs for this preset.

Create a button which switches on the Non stop preset or let it switch by a GPI.

